#DocuSign Setup
Create an account at demo.docusign.net
 Figure 1
Log in to DocuSign and open Settings
Navigate to Integration > Apps and Keys
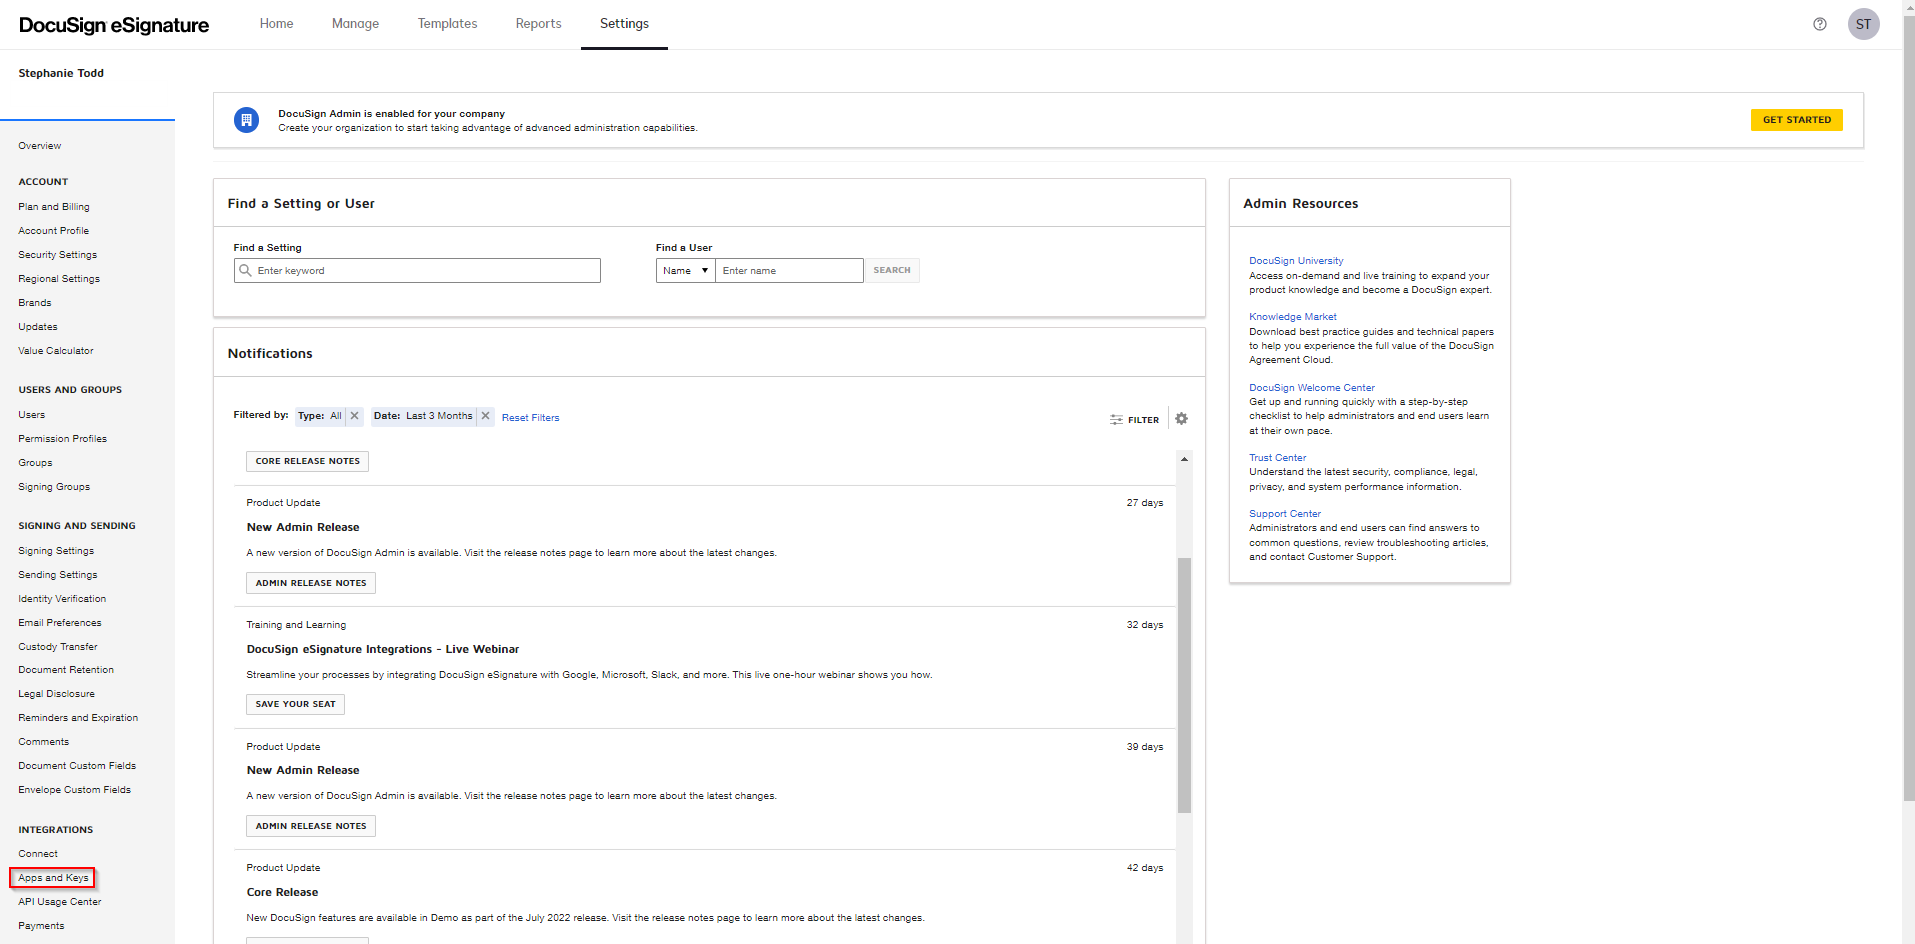 Figure 2
Click the Quickstart link

Figure 3
Add a Name, select language C# and click Download
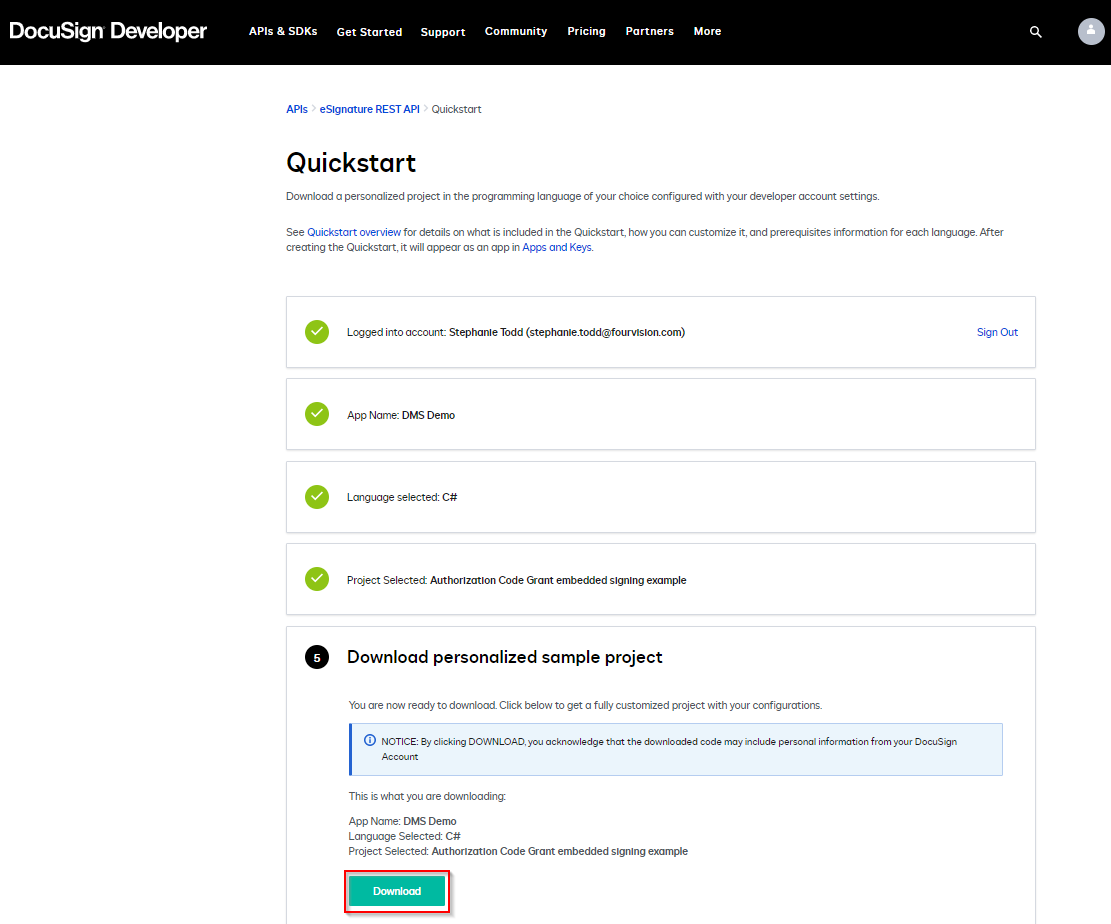
Figure 4
Open the .Zip file, navigate to “App name”-c#.zip\“App name”--c#\launcher-csharp and open appsettings.json
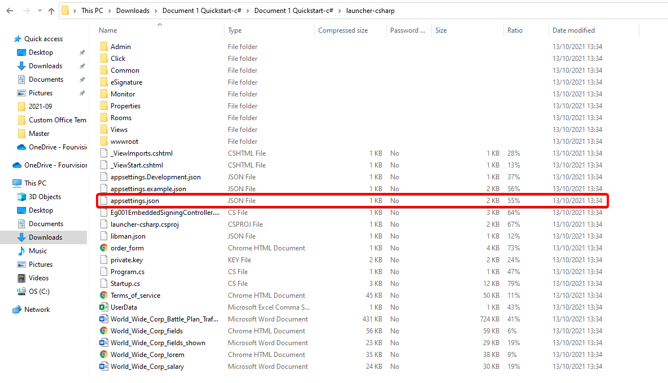
Figure 5
Note the values ClientId, ClientSecret, ImpersonatedUserId and AuthServer
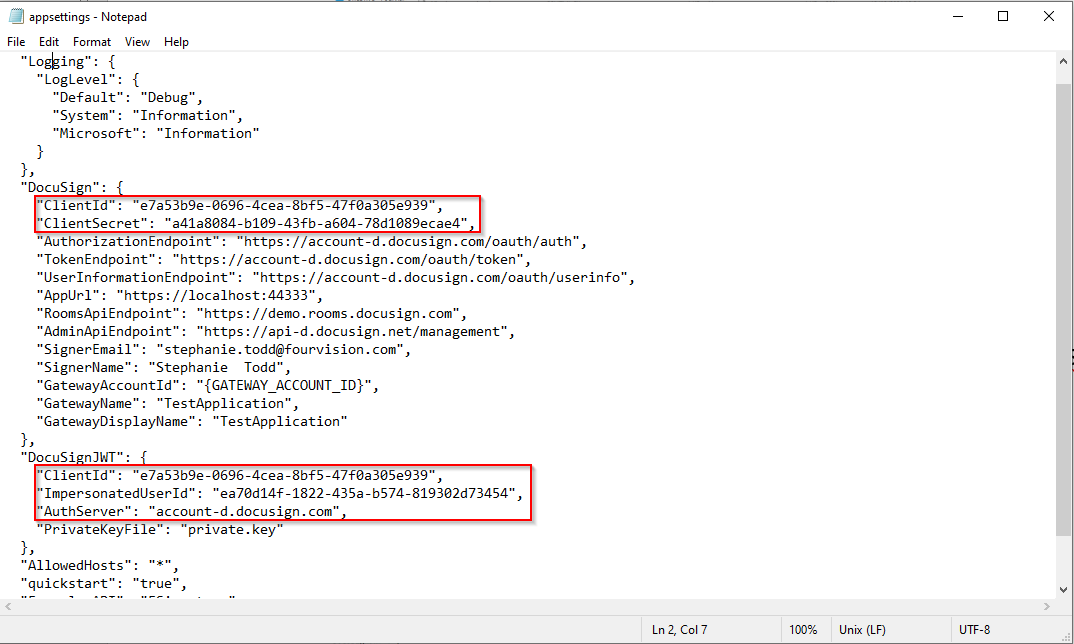
Figure 6
Open Document Management, navigate to Admin > General > Parameters > Features and enable DocuSign

Figure 7
Navigate to Admin > General > Connection profiles:
Enter ClientID in DocuSign client ID
ClientSecret in DocuSign client secret
ImpersonatedUserId in DocuSign impersonated user ID and
AuthServer in DocuSign auth server
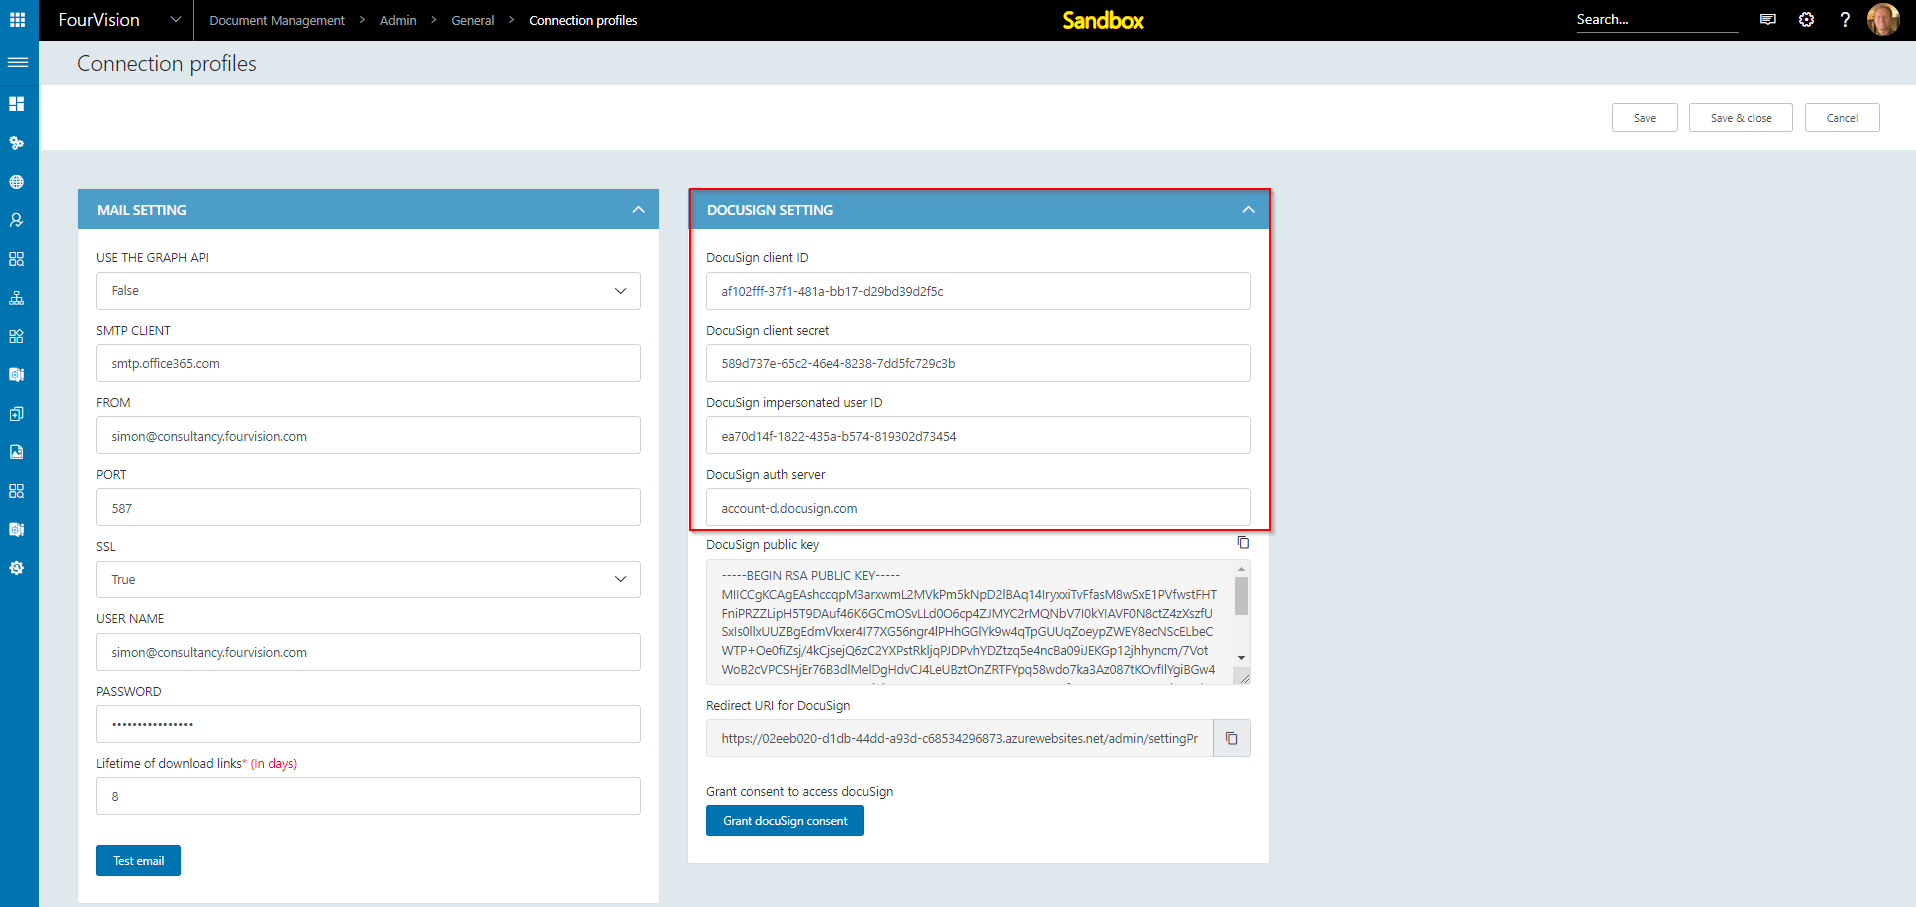
Figure 8
Copy the DocuSign public key
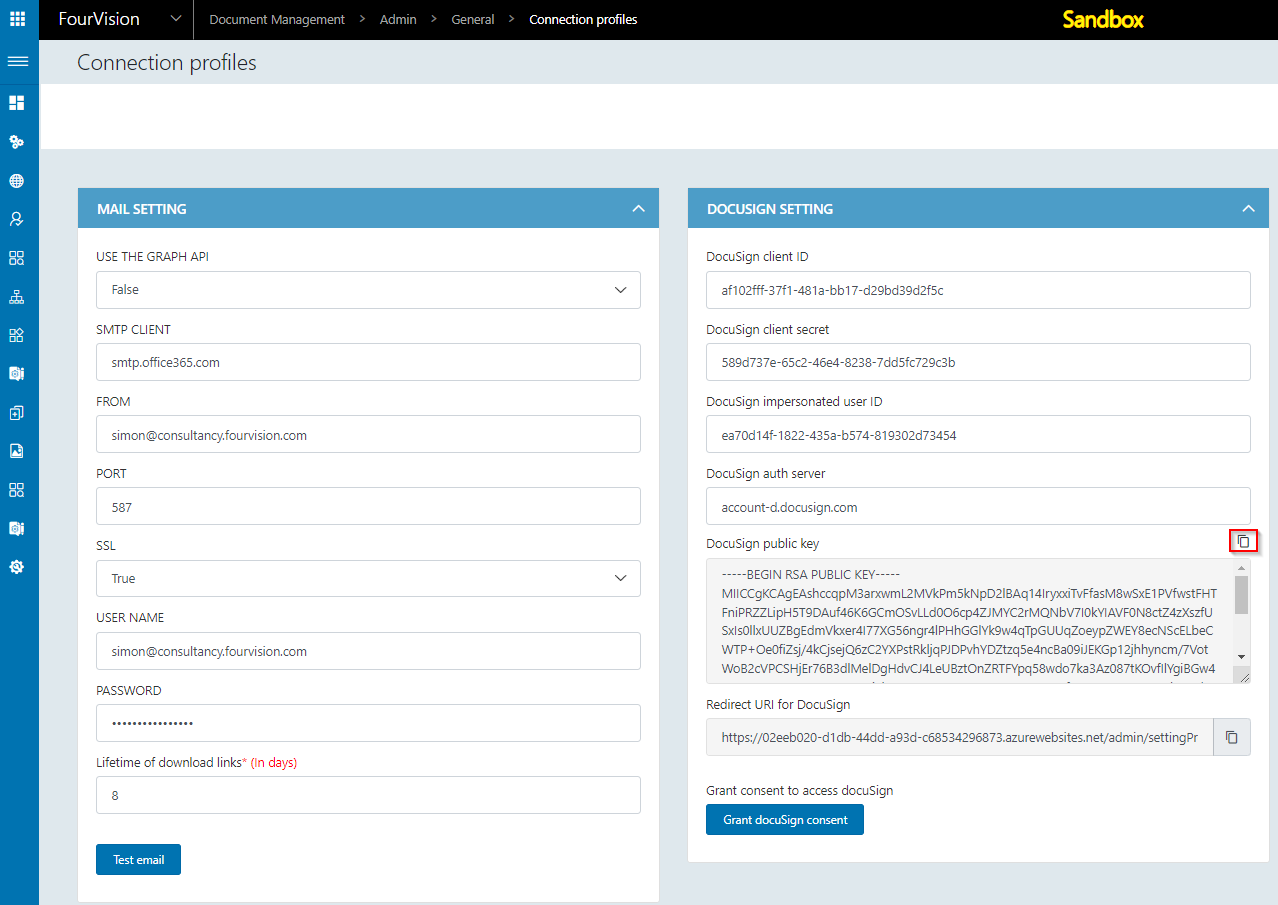
Figure 9
Edit the Quickstart Apps and Integration Key
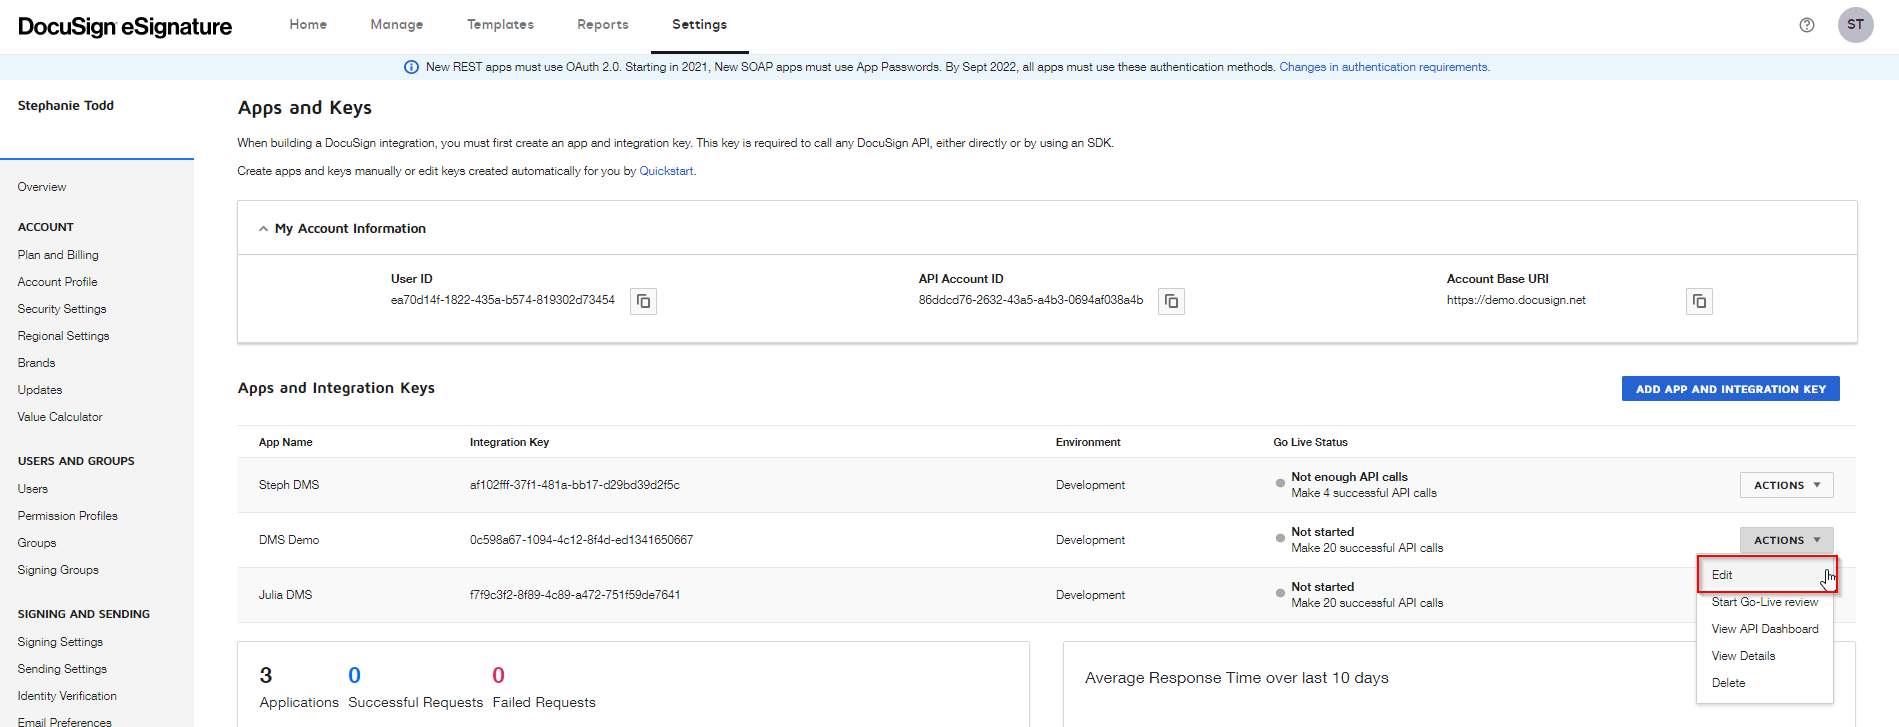
Figure 10
Click Upload RSA
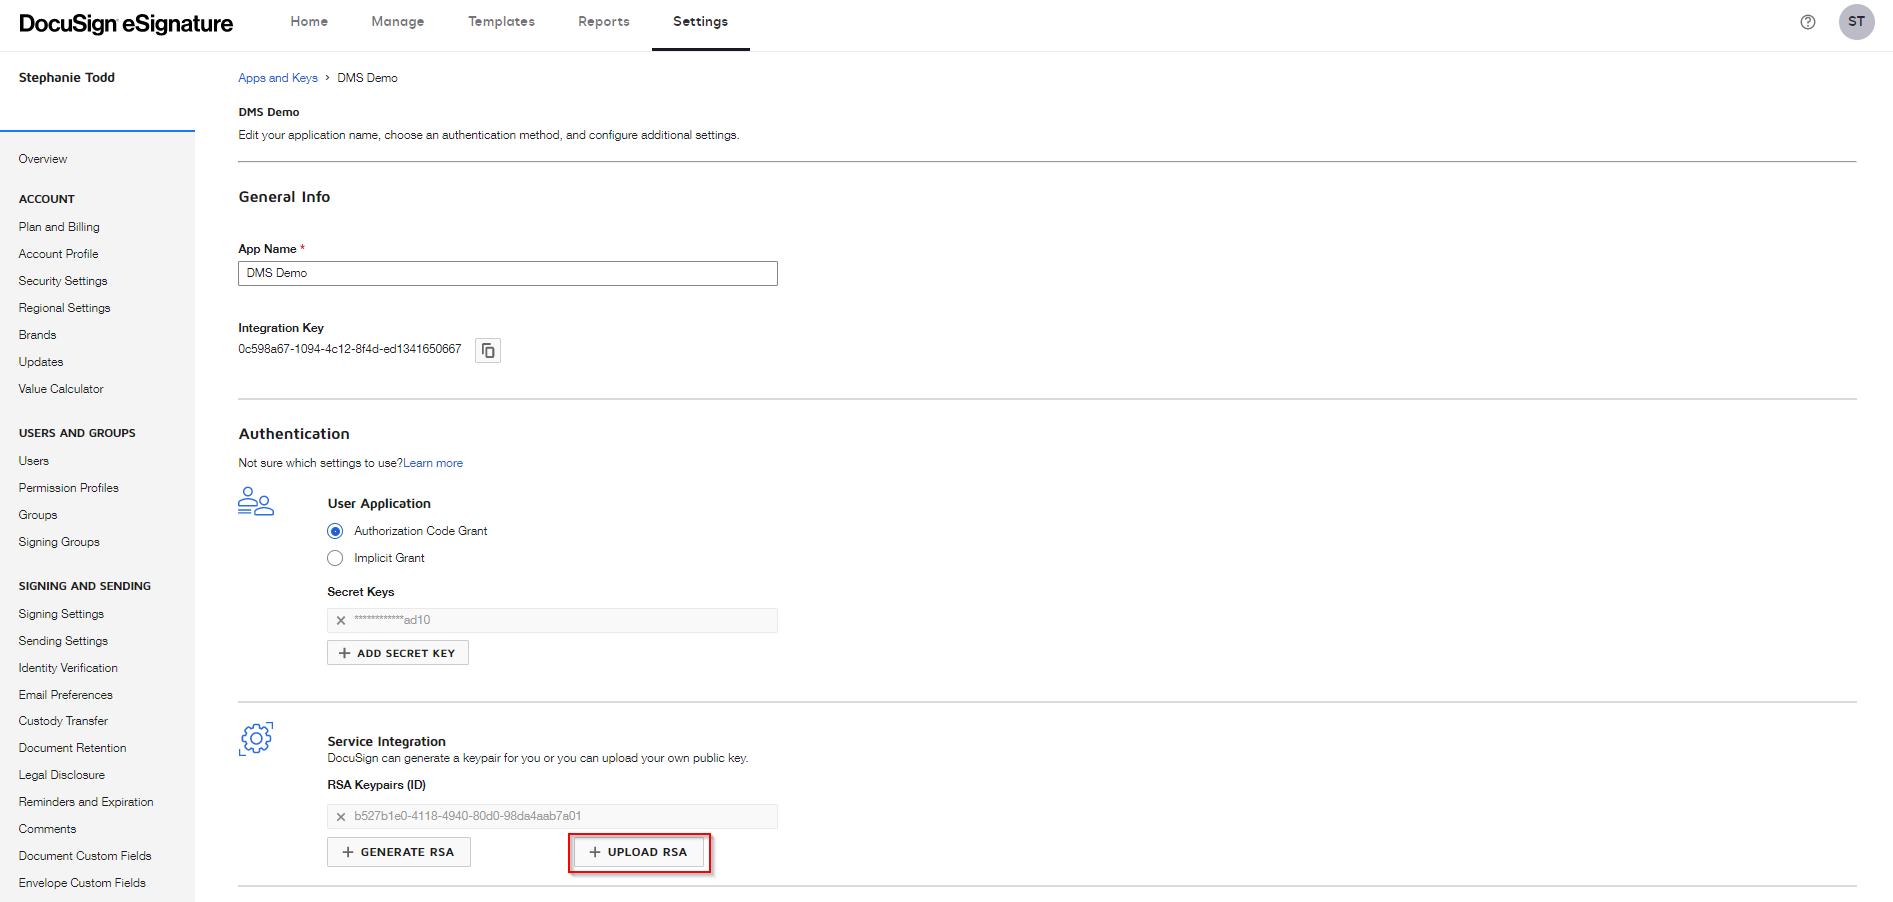
Figure 11
Paste the copied DocuSign public key then click Upload key
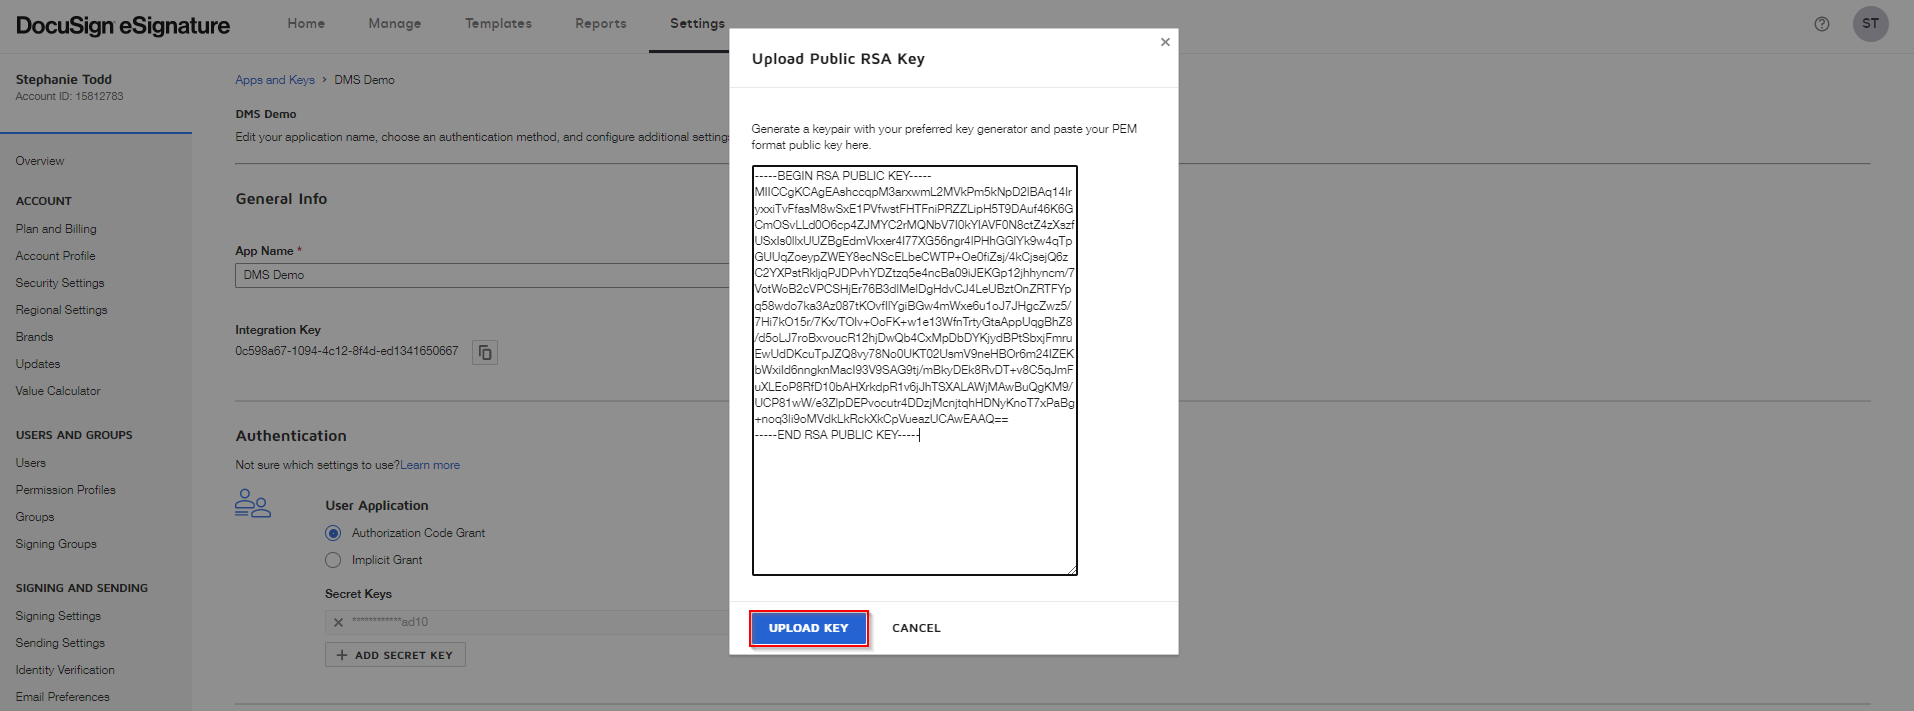
Figure 12
Add the Redirect URLs, where the URL is that of the Document Management Web App
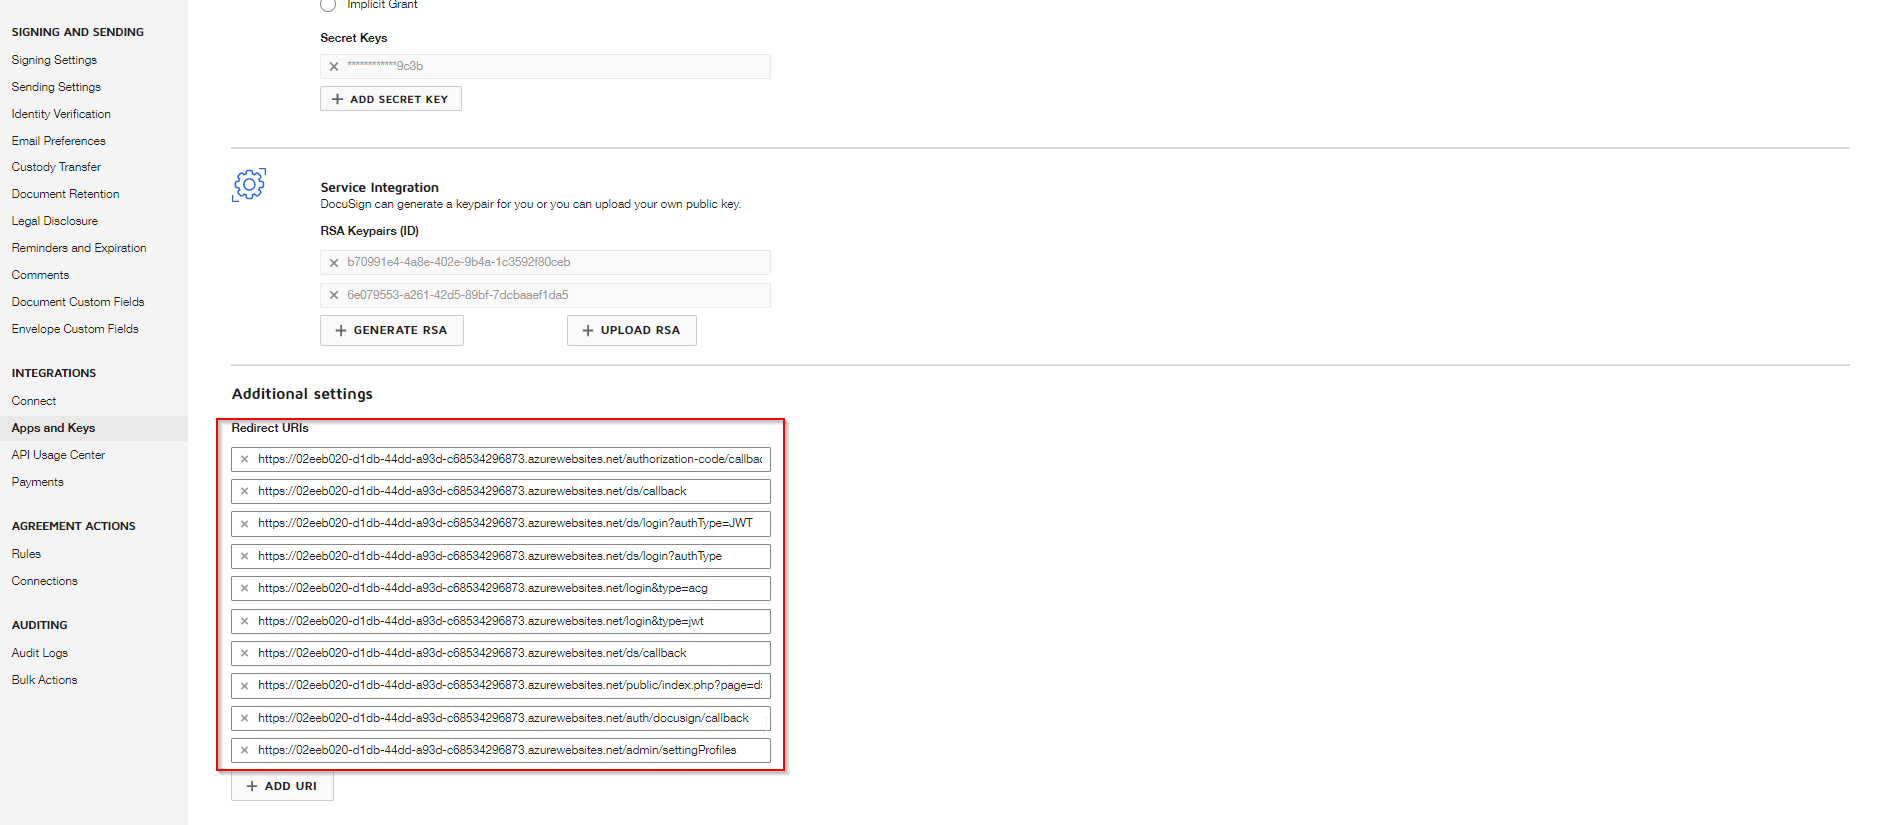
Figure 13
Save all changes and click Grant DocuSign consent
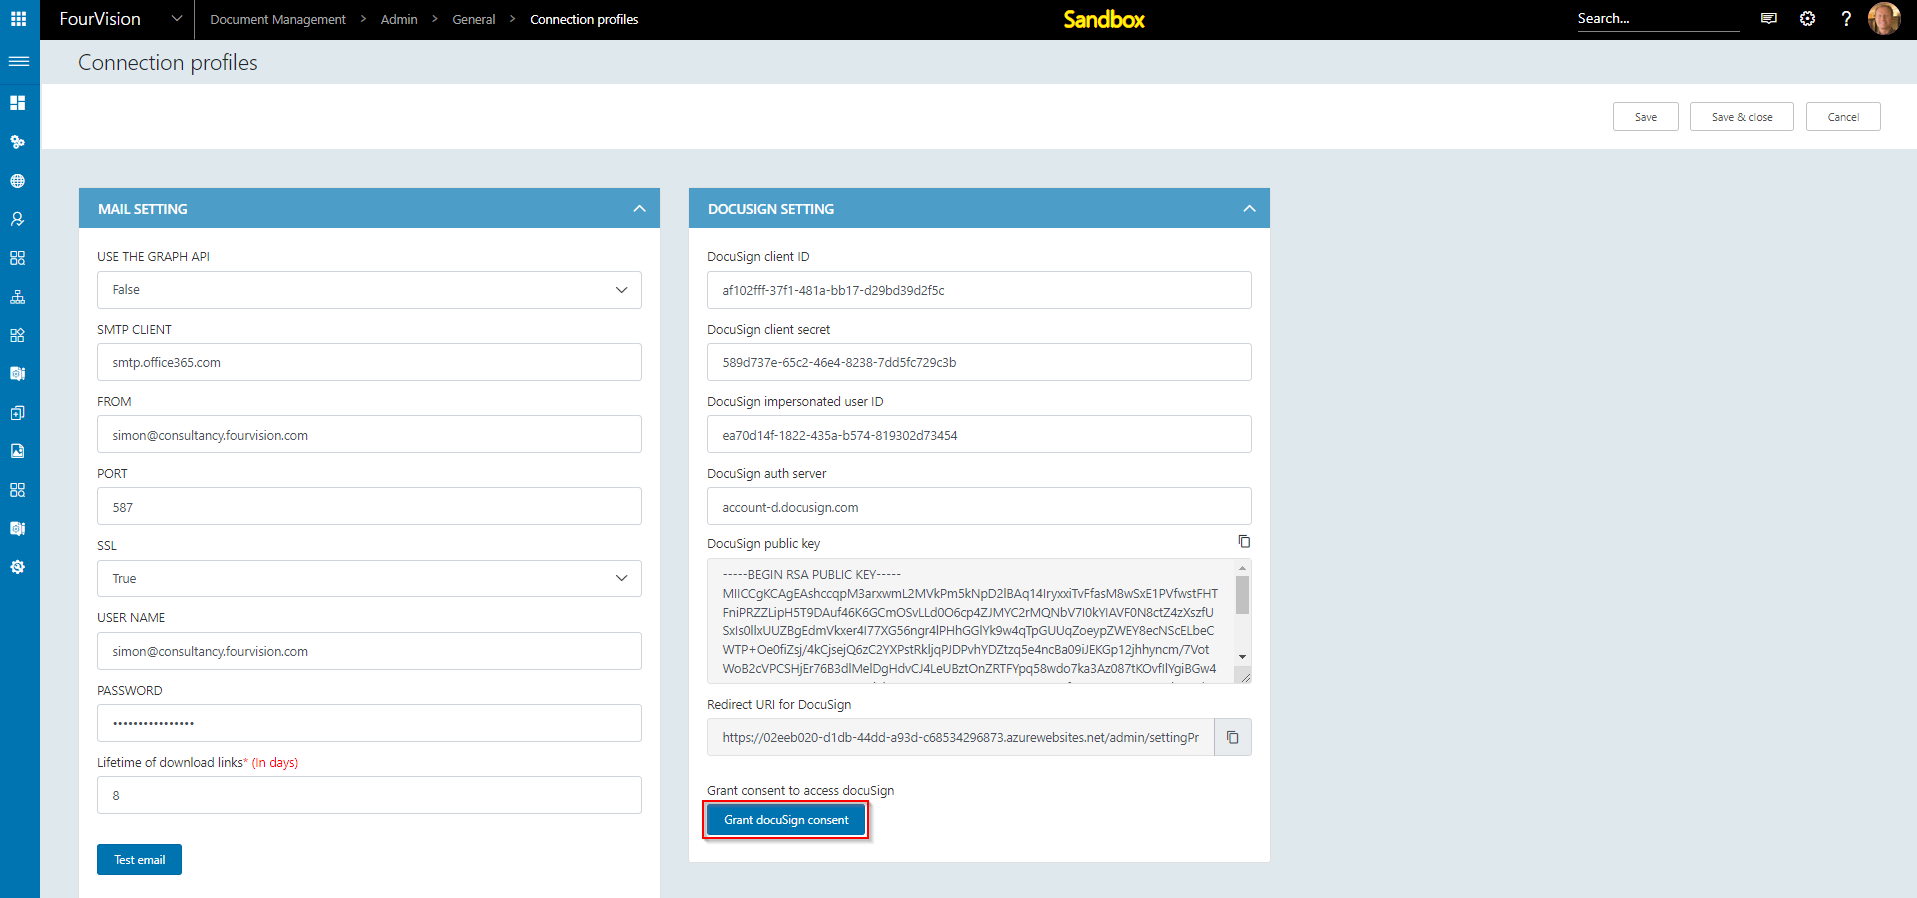
Figure 14
In the new tab, click Accept
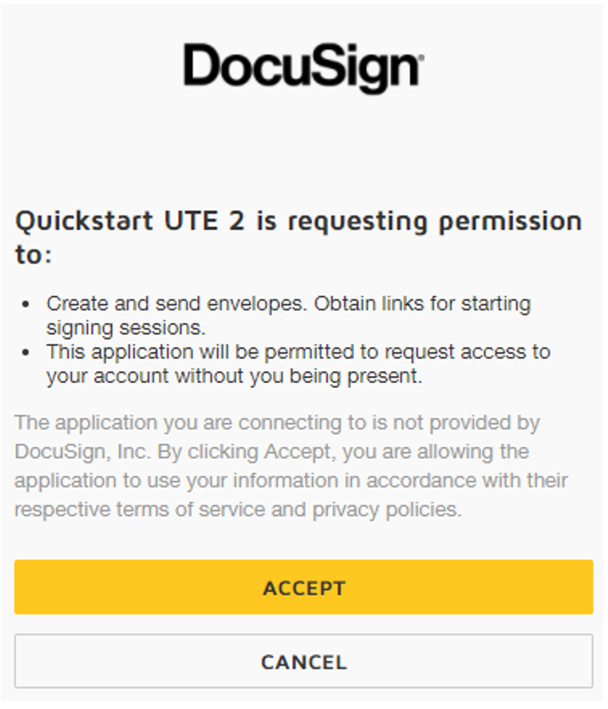
Figure 15
#Document Management Setup
Navigate to Admin > Workflows > Workflows and create a workflow

Figure 16
Create workflow statuses

Figure 17
Navigate to Admin > Workflows > Successor steps and create successor steps

Figure 18
Navigate to Admin > Categories and create a new category

Figure 19
Edit the category and enable Workflow can not change and DocuSign, select Signed by and Workflow status

Figure 20
Navigate to Admin > Category groups and create a new category group
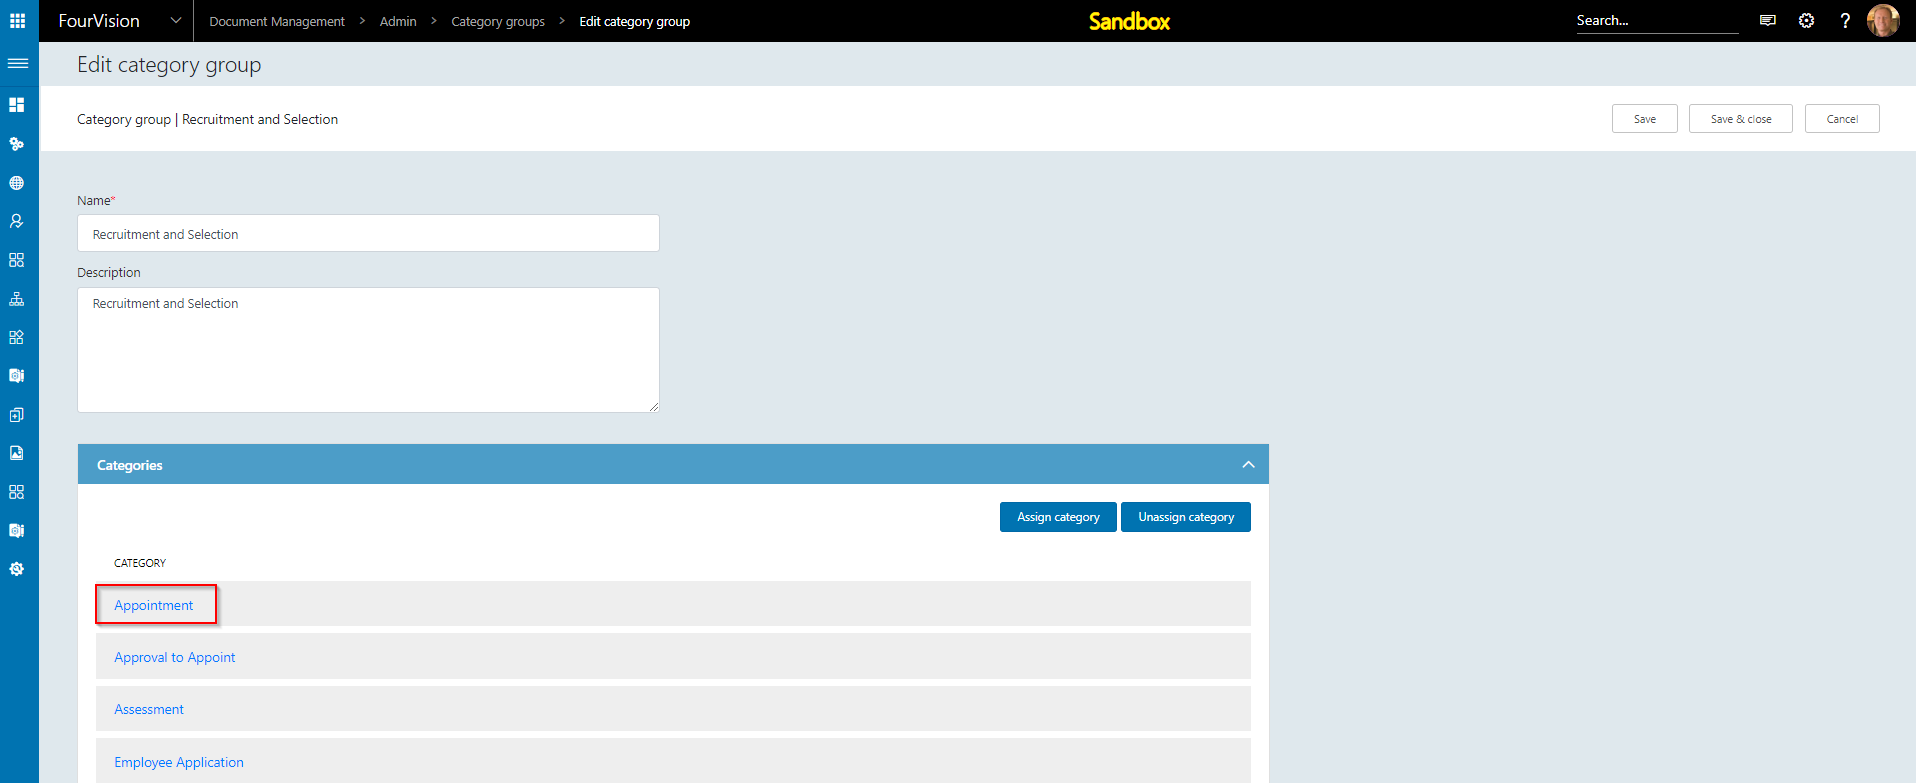
Figure 21
#Create an Applicant/Offer Letter
Navigate to Manager > Recruitment > Applicants and create an applicant

Figure 22
Create a document for the applicant

Figure 23
Select New to upload a new document

Figure 24
Note the document must contain the placeholder "Esign1". This will allow the applicant to sign the document when redirected to DocuSign.
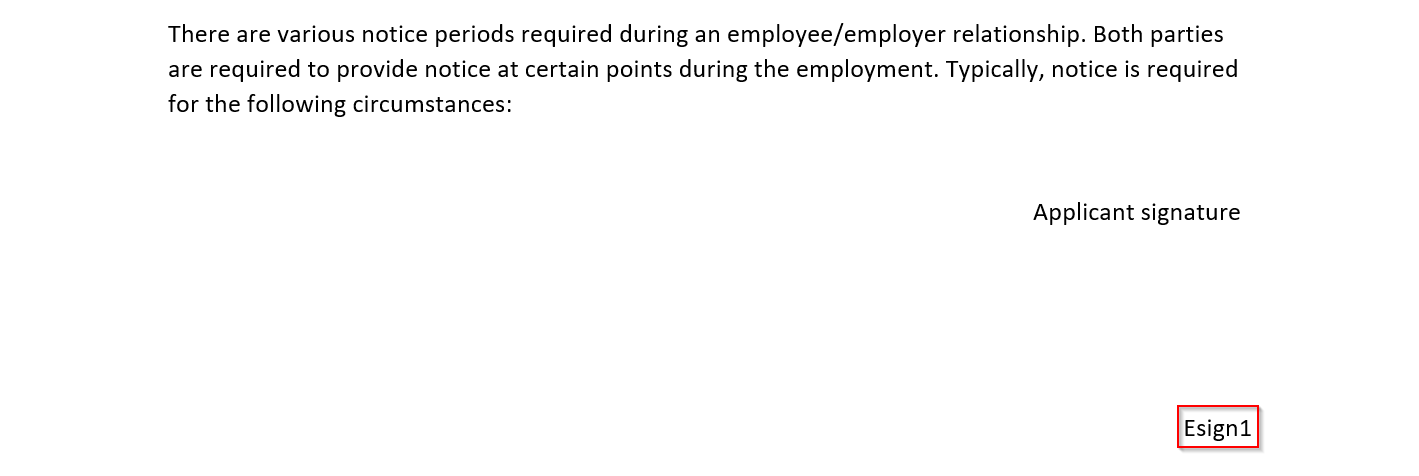
Figure 25
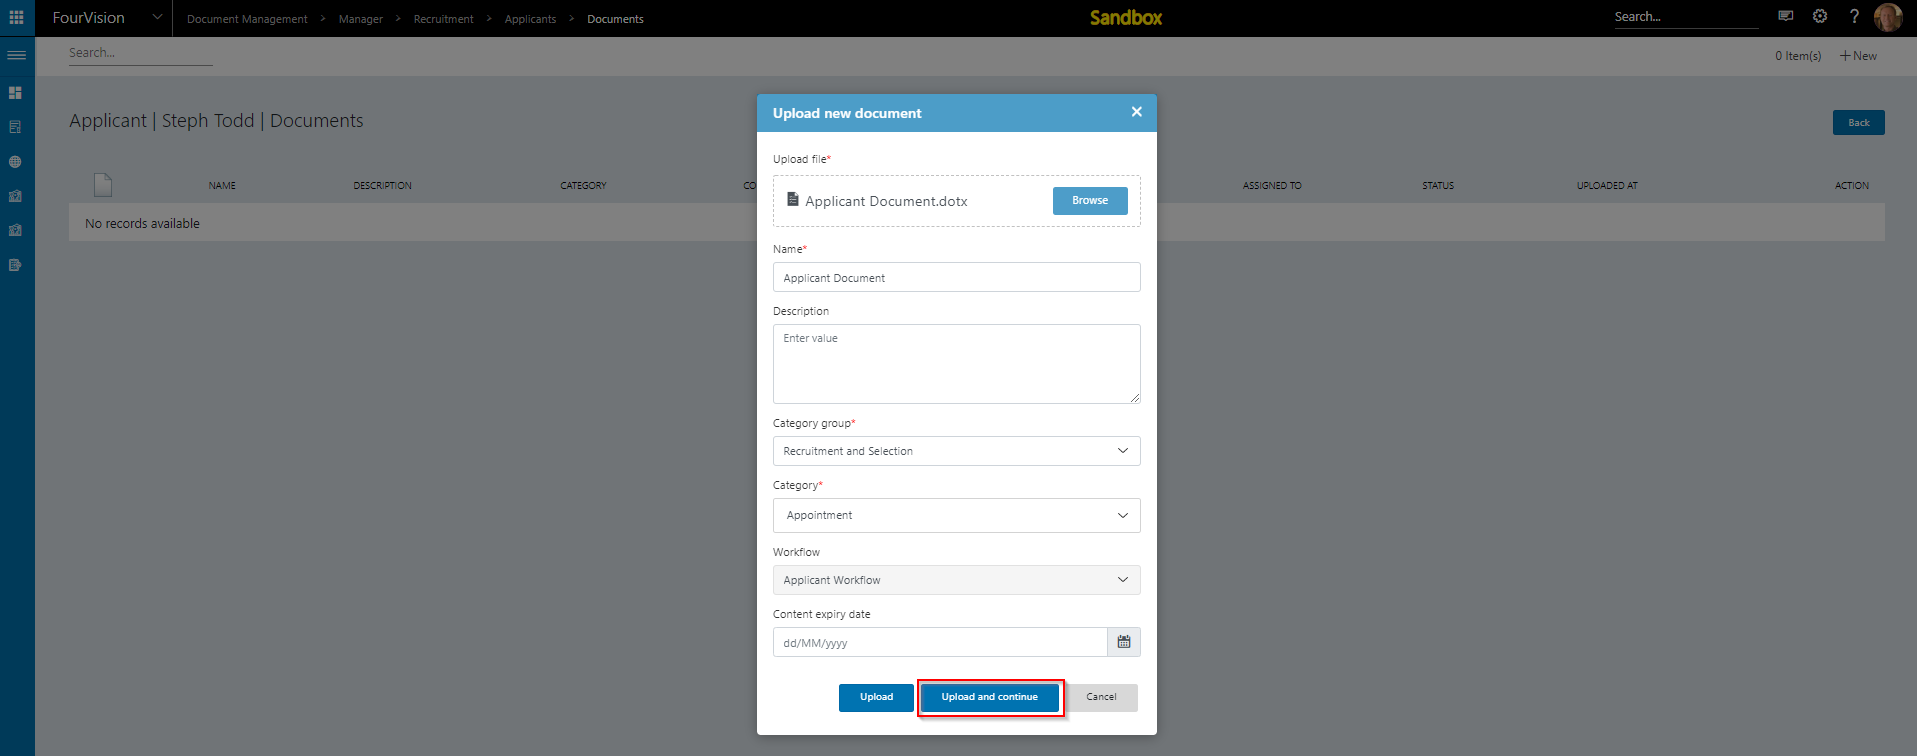
Figure 26
Submit the document to workflow
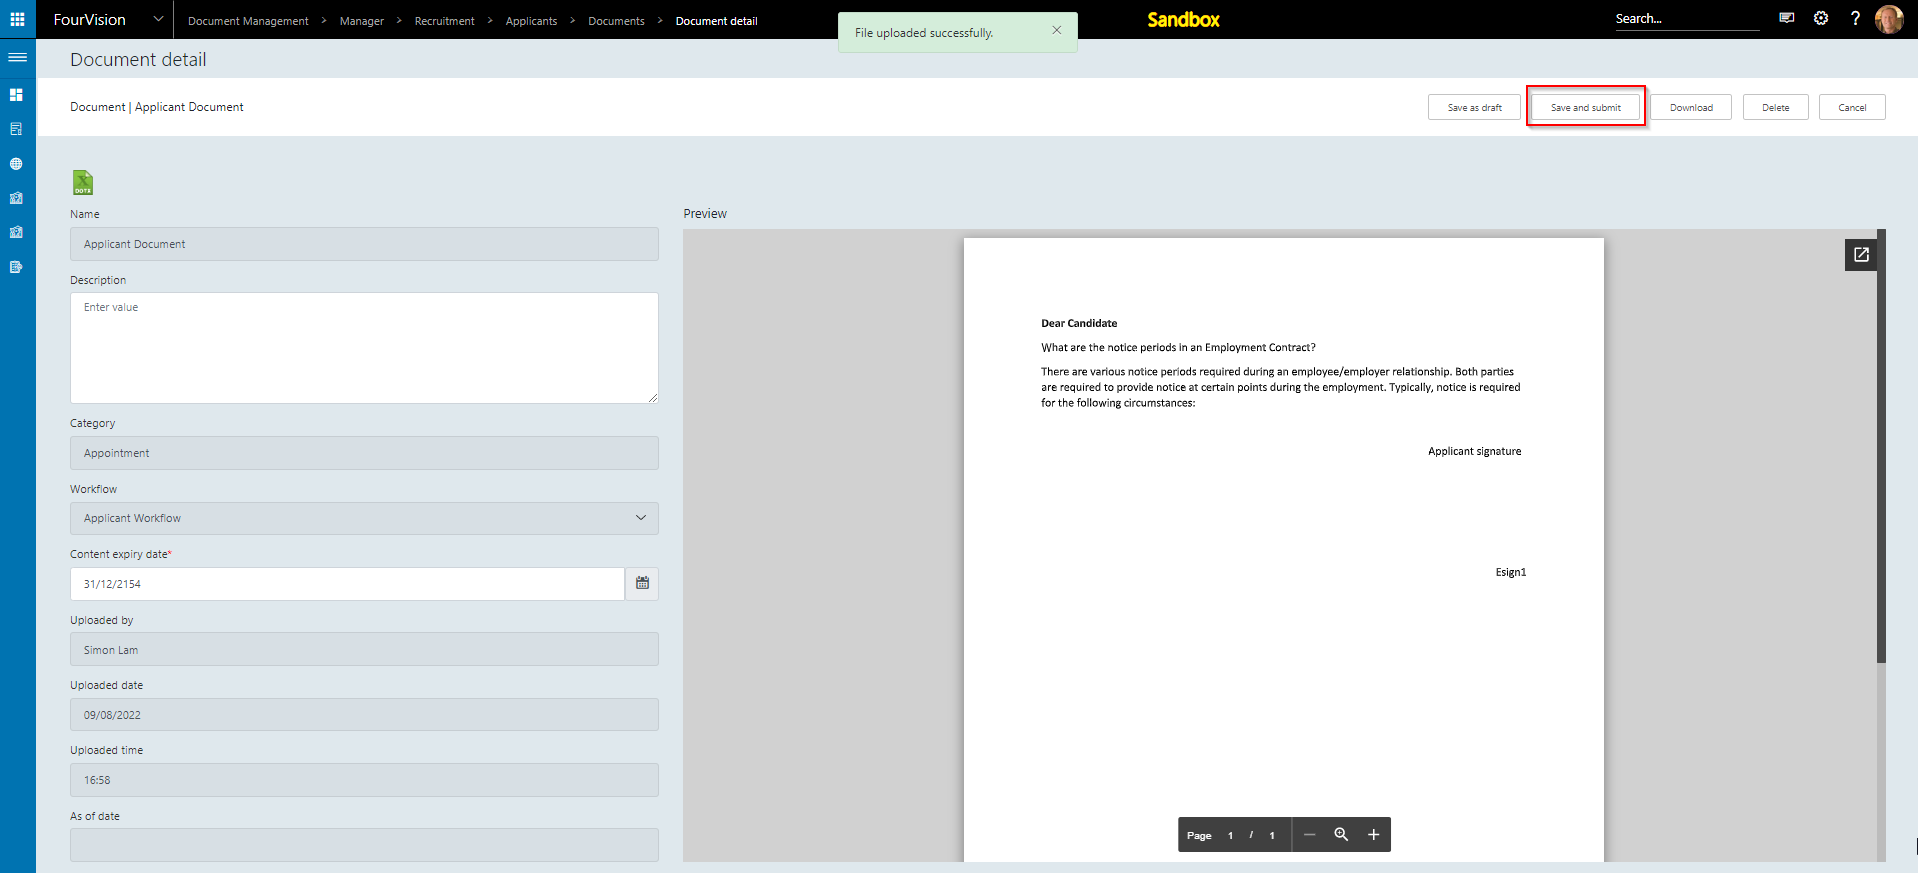
Figure 27
Enter the Applicant record again, select Applicant signature

Figure 28
The applicant will receive an email, click Review Document
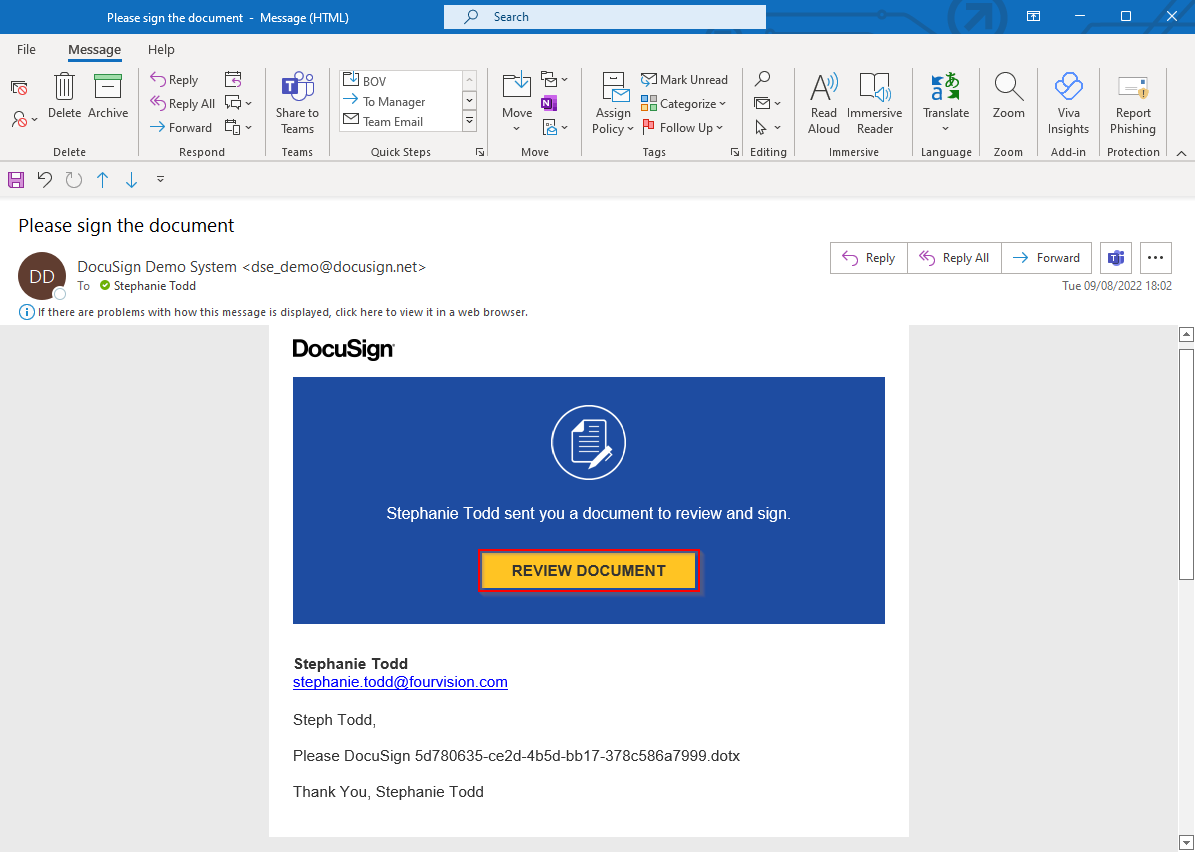
Figure 29
When redirected to DocuSign, select Sign to add signature and click finish to complete.
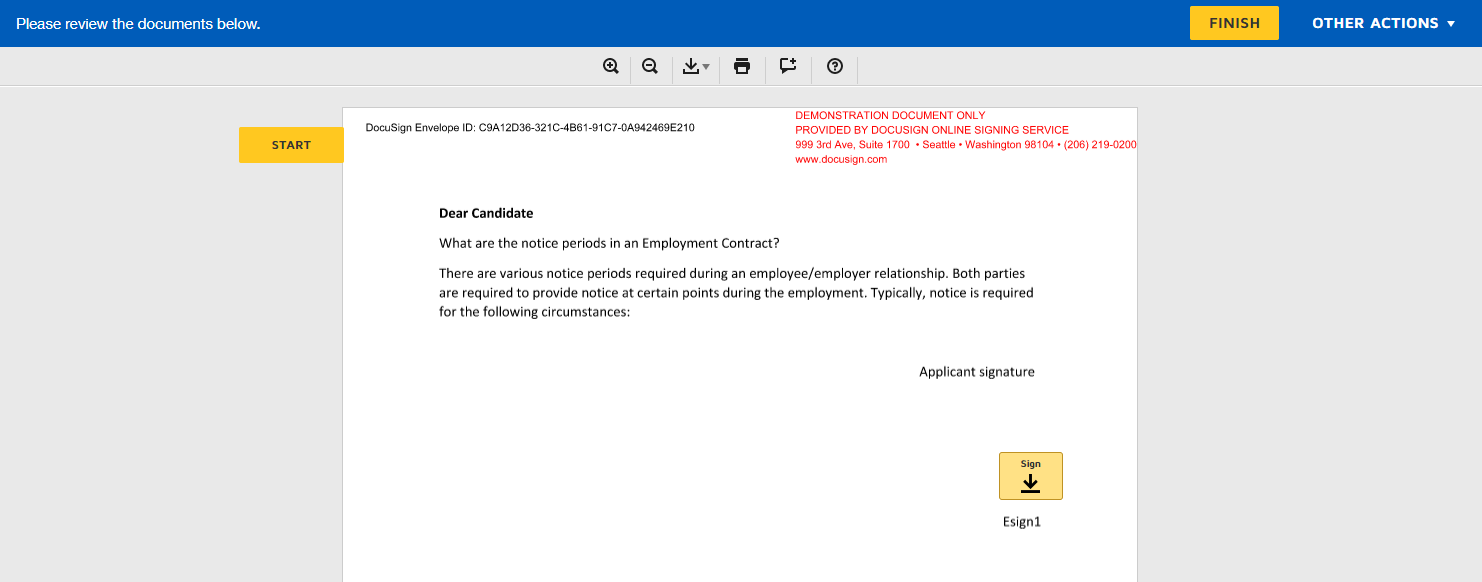
Figure 30
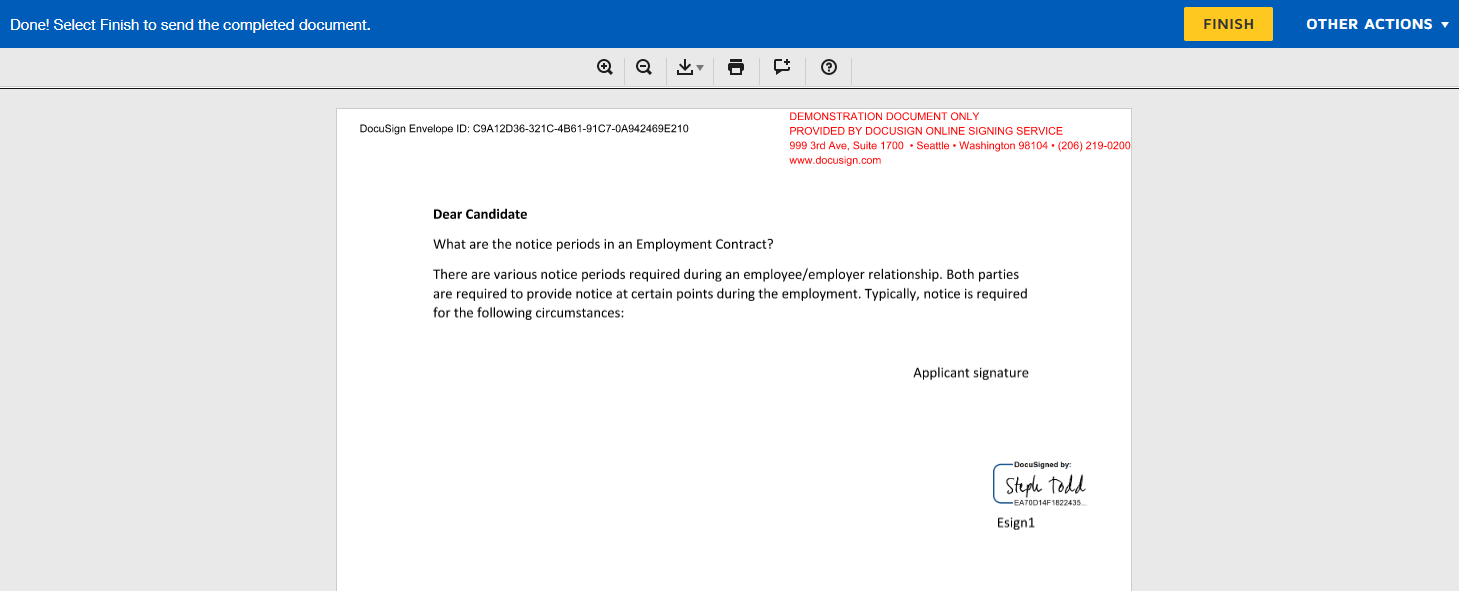
Figure 31
Return to the applicant details and click "Get signing status

Figure 32
The pop up screen will inform the user that the document signing process has been completed.

Figure 33
To complete the process, select Approve to end the workflow.

Figure 34
The signed document will be converted to PDF and can be downloaded.

Figure 35

Figure 36
Multiple signees for DocuSign
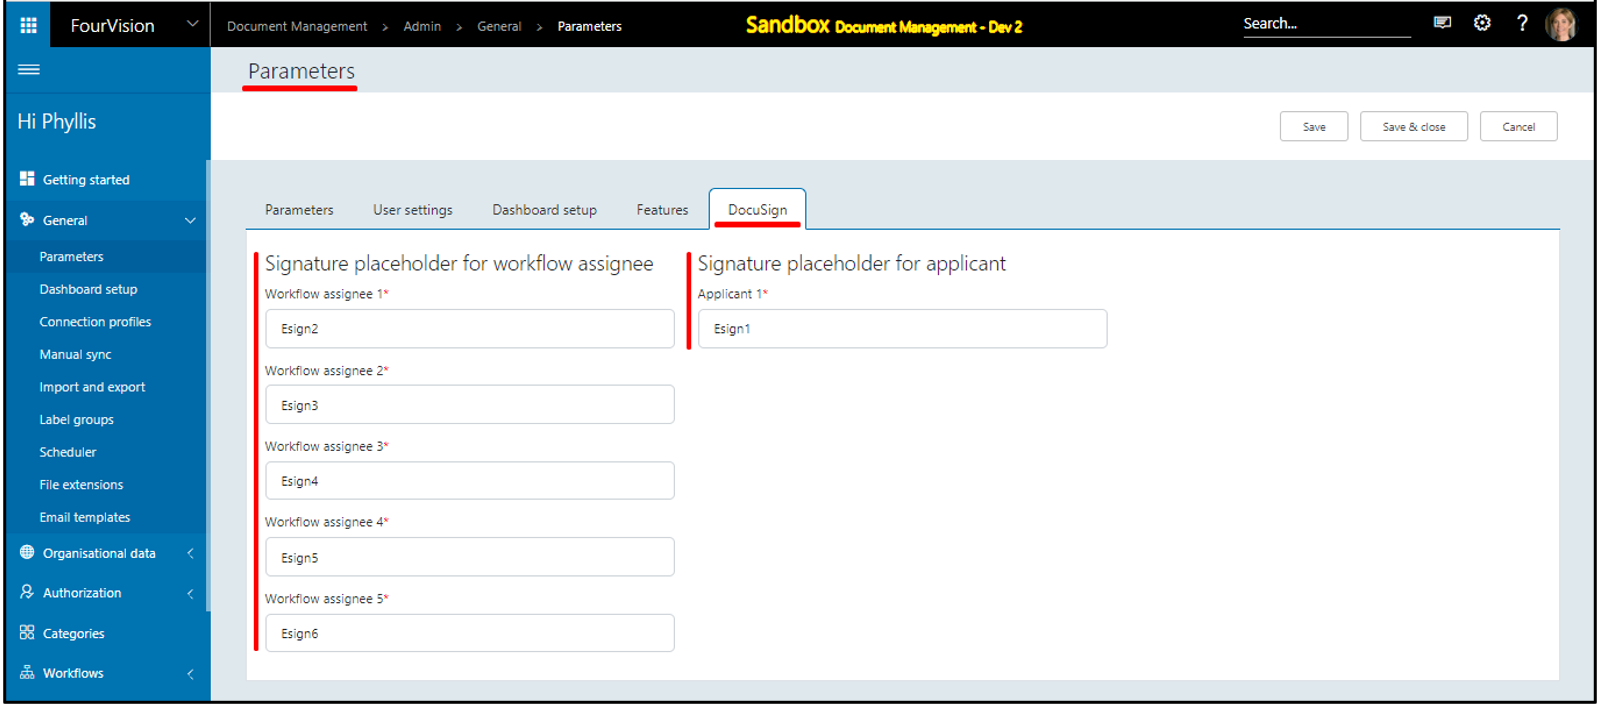
Enabled the ‘DocuSign’ feature key and the ‘DocuSign’ tab showing on the 'Parameters' screen.

Under the ‘DocuSign’ tab, set values for the ‘Signature placeholder for workflow assignee’ and ‘Signature placeholder for applicant’ tabs
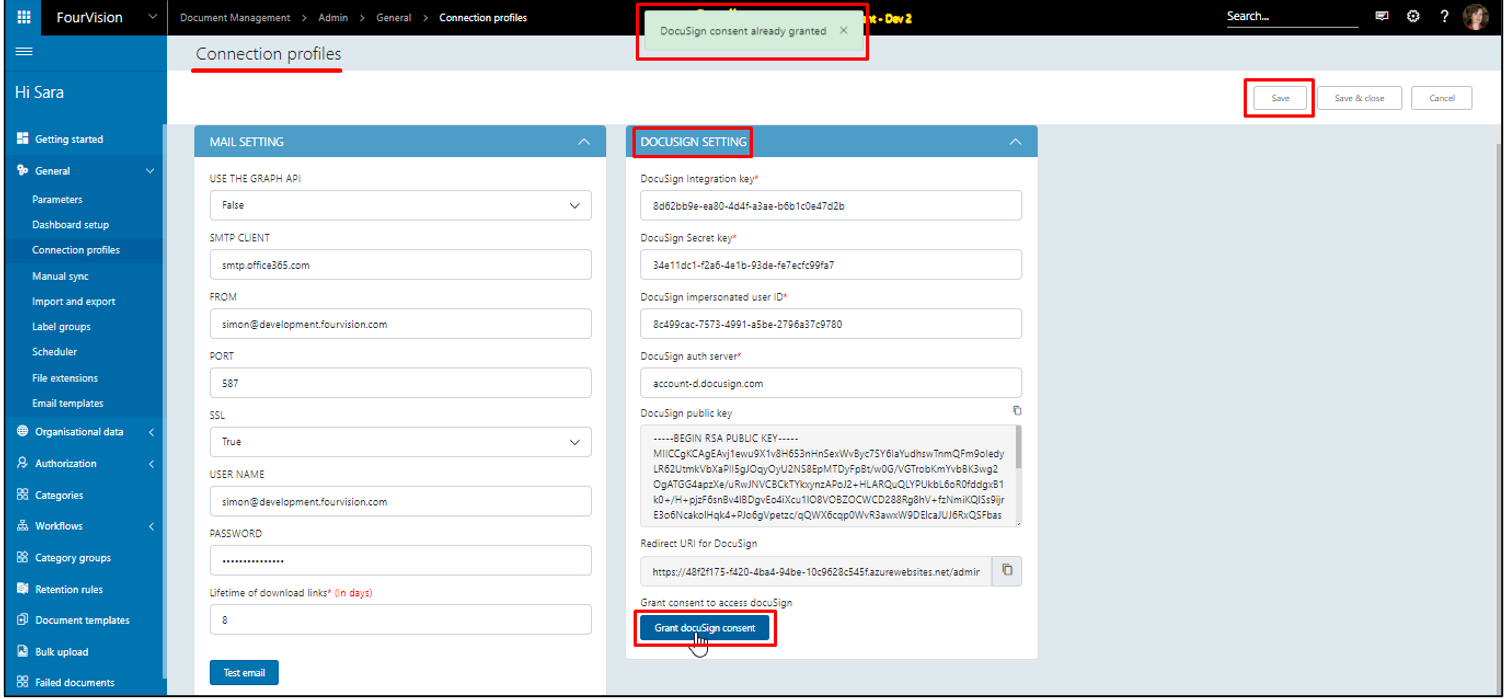
On the 'Connection profiles' screen, under the ‘DocuSign setting’ tab, set the details
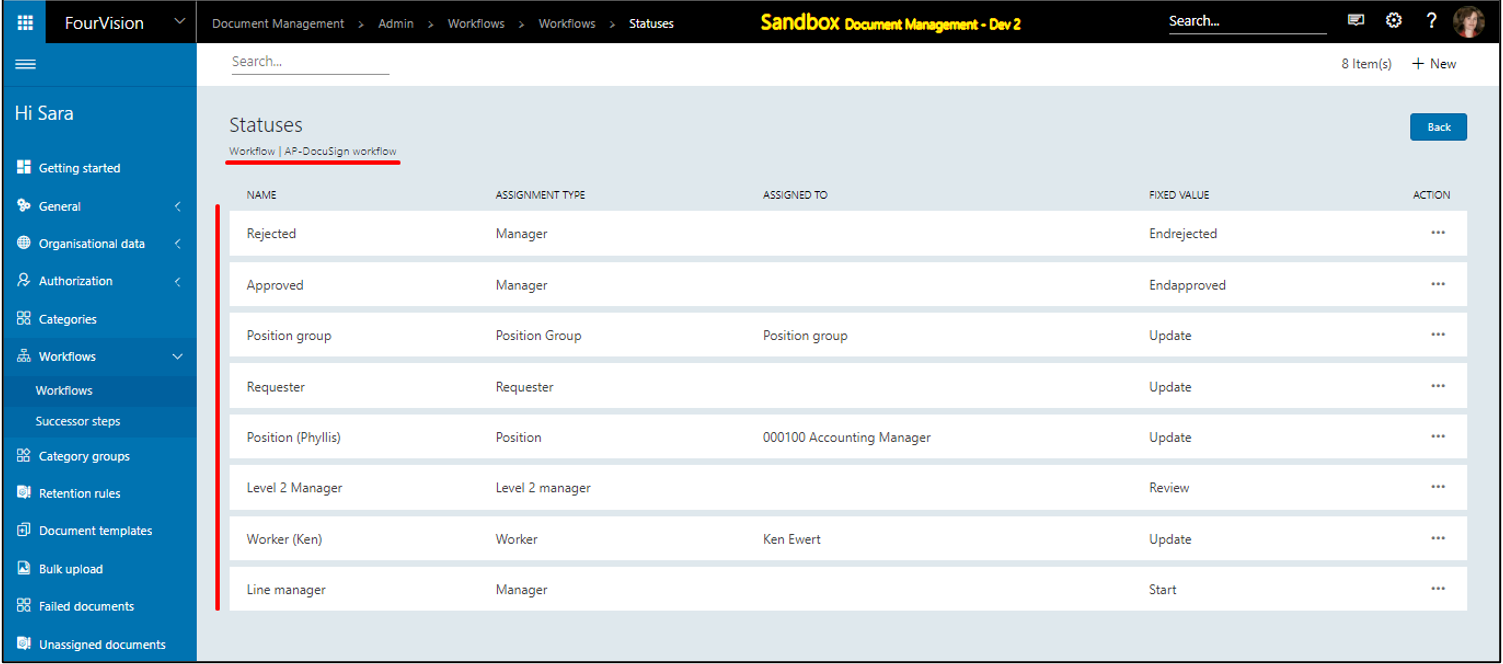
The statuses used in the workflow
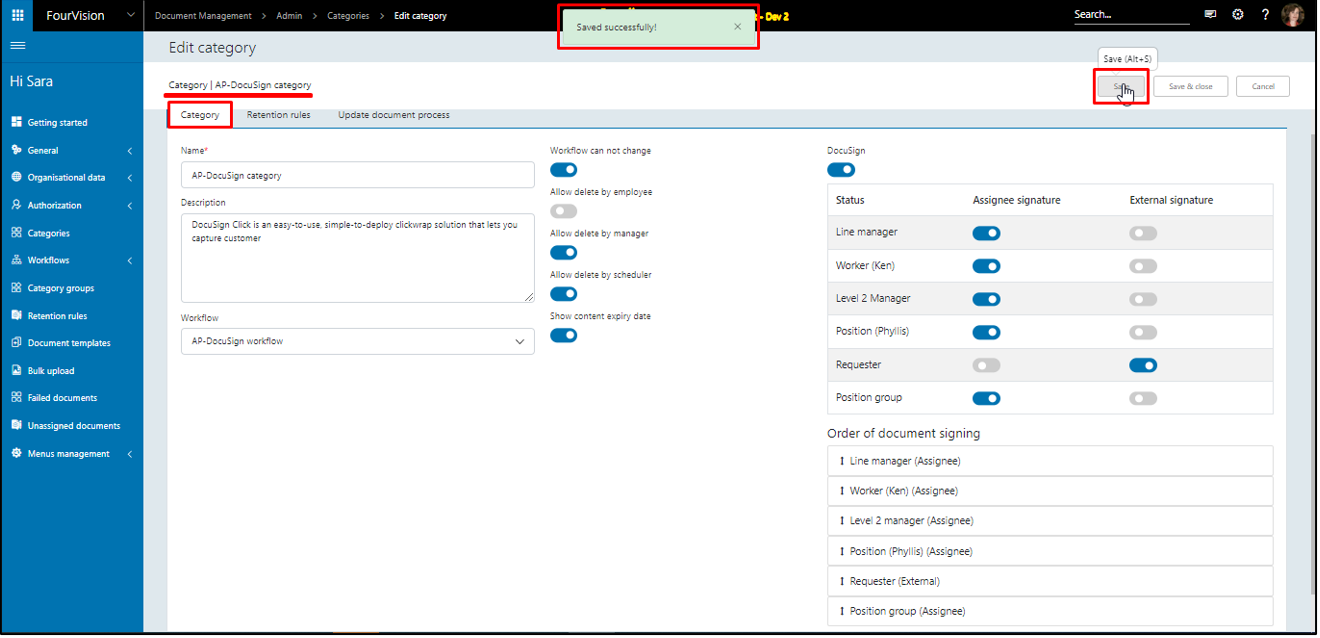
Enabled the ‘DocuSign’ toggle, added Workflow statuses and enabled toggles for the ‘Assignee signature’ and ‘External signature’ columns
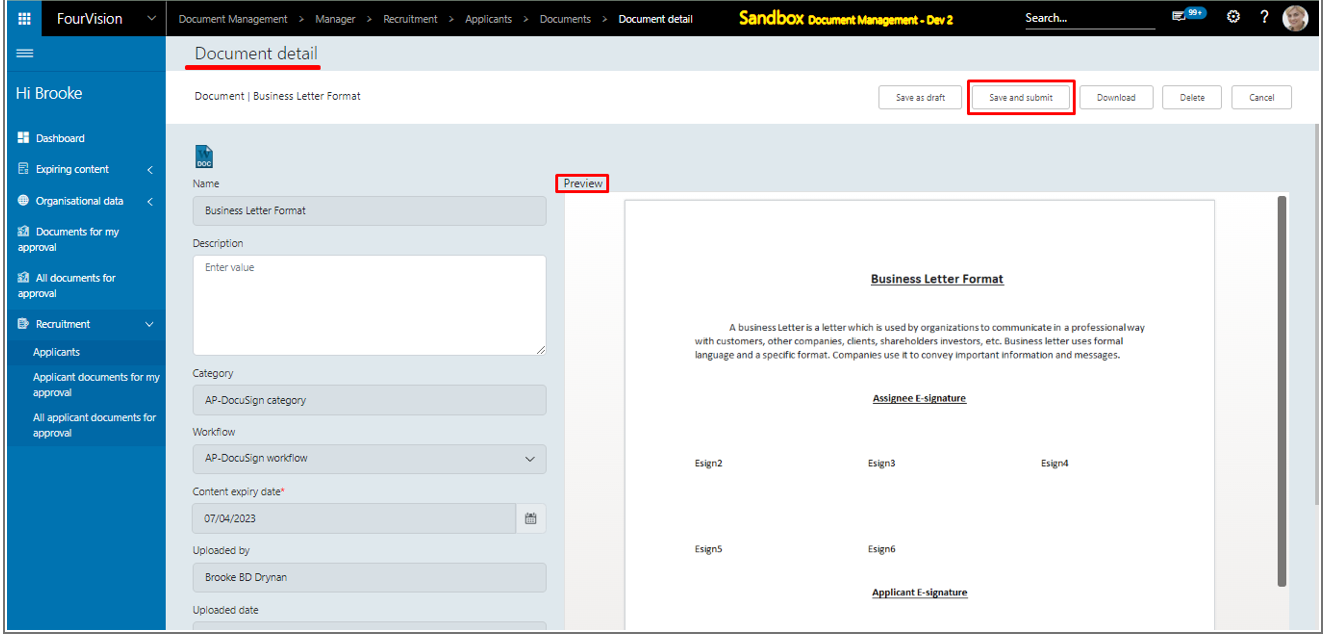
For a particular Applicant, upload a document for signing

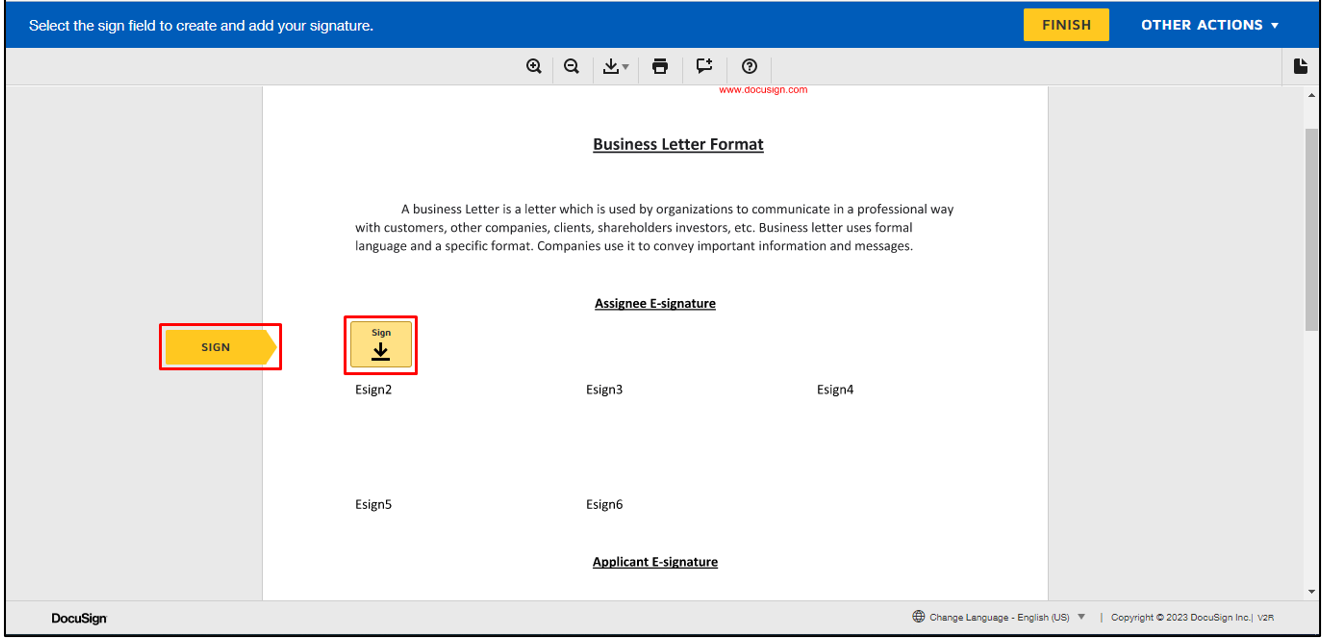
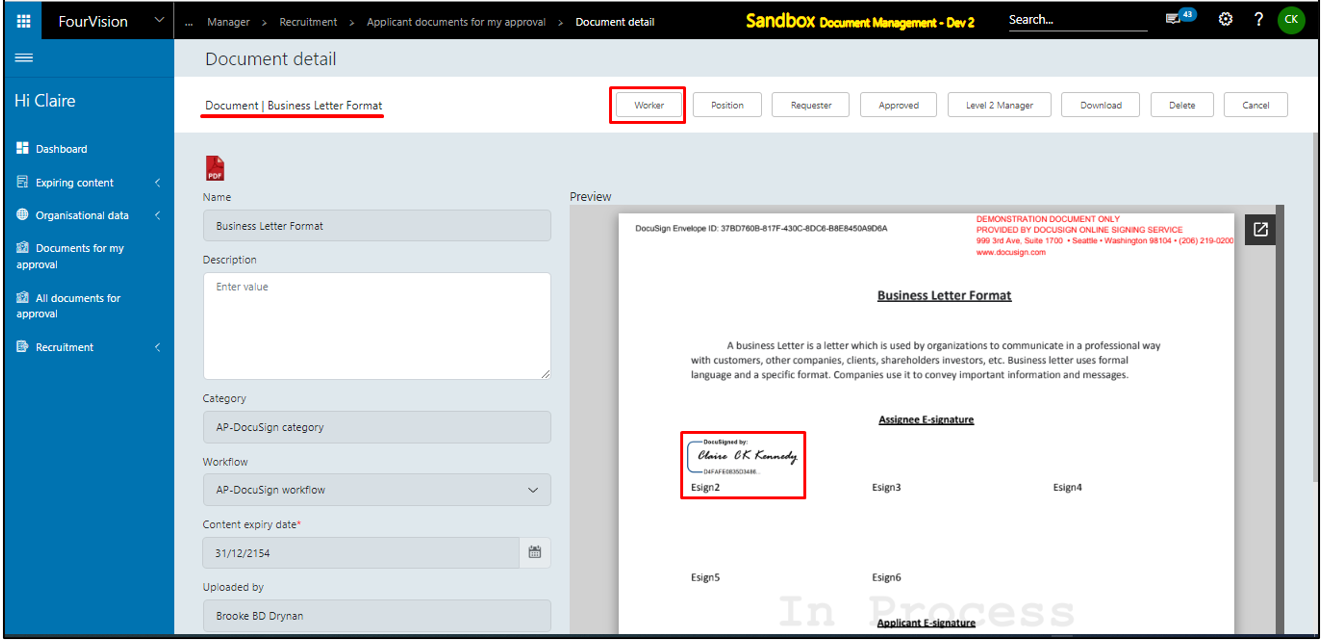
With the user 'Claire Kennedy' (Line manager), click on the ‘Sign’ button to sign the document
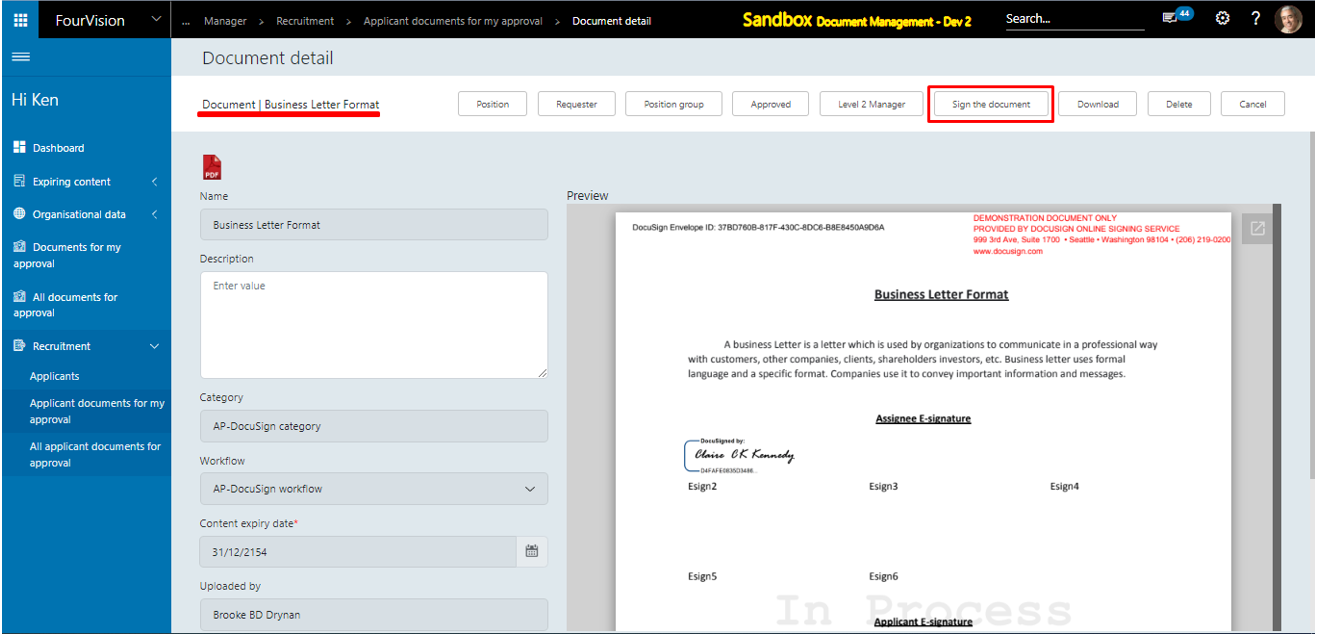
With the user 'Ken Ewert' (Worker), click on the ‘Sign the document’ button to sign the document
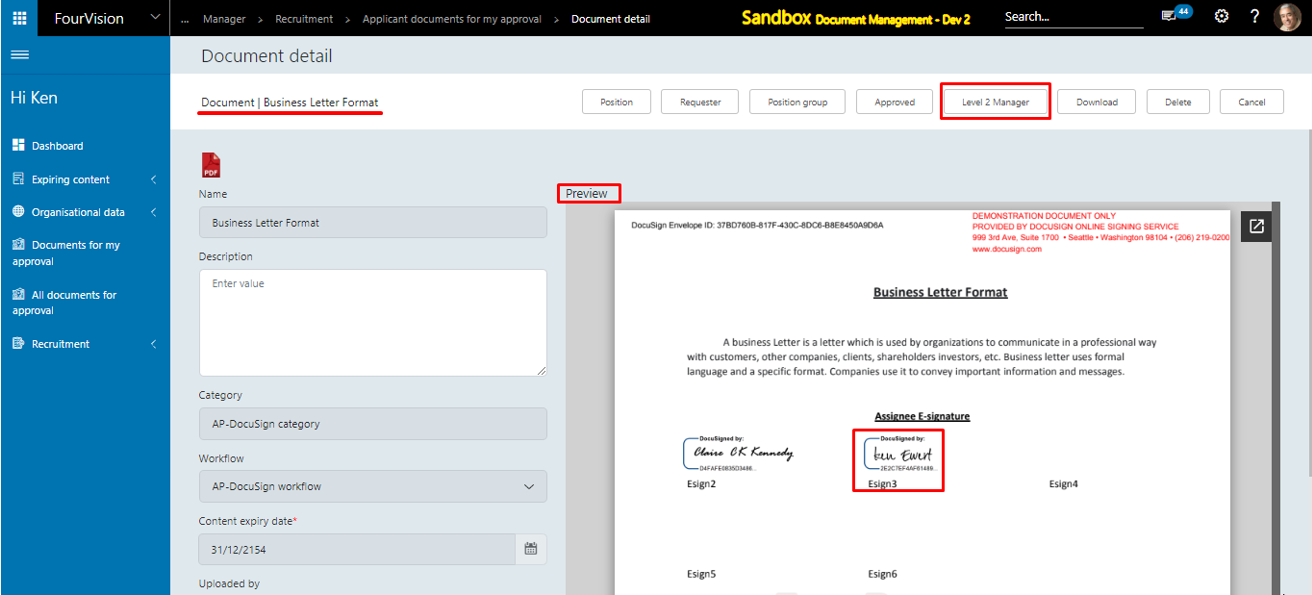
With the user ‘Charlie Carson’ (Level 2 Manager), sign the document
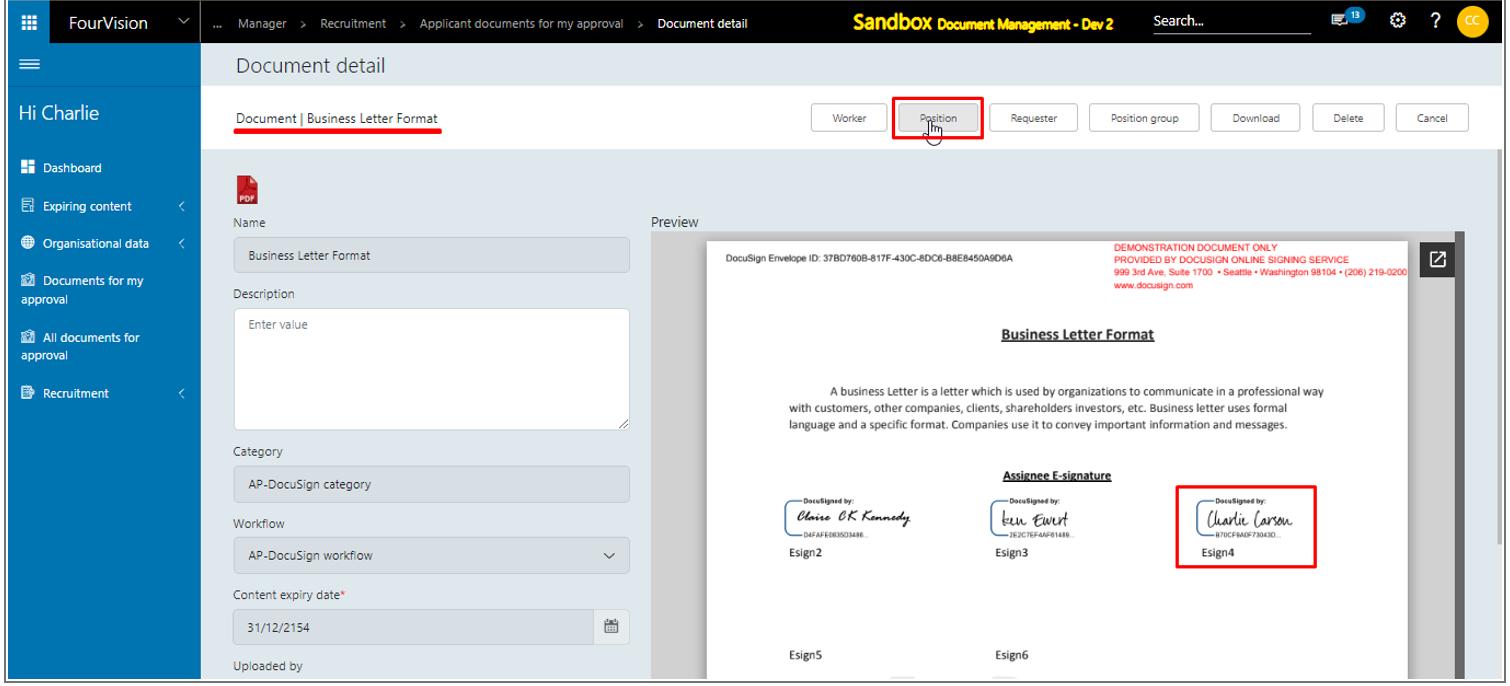
With the user ‘Phyllis Harris’ (Position), sign the document
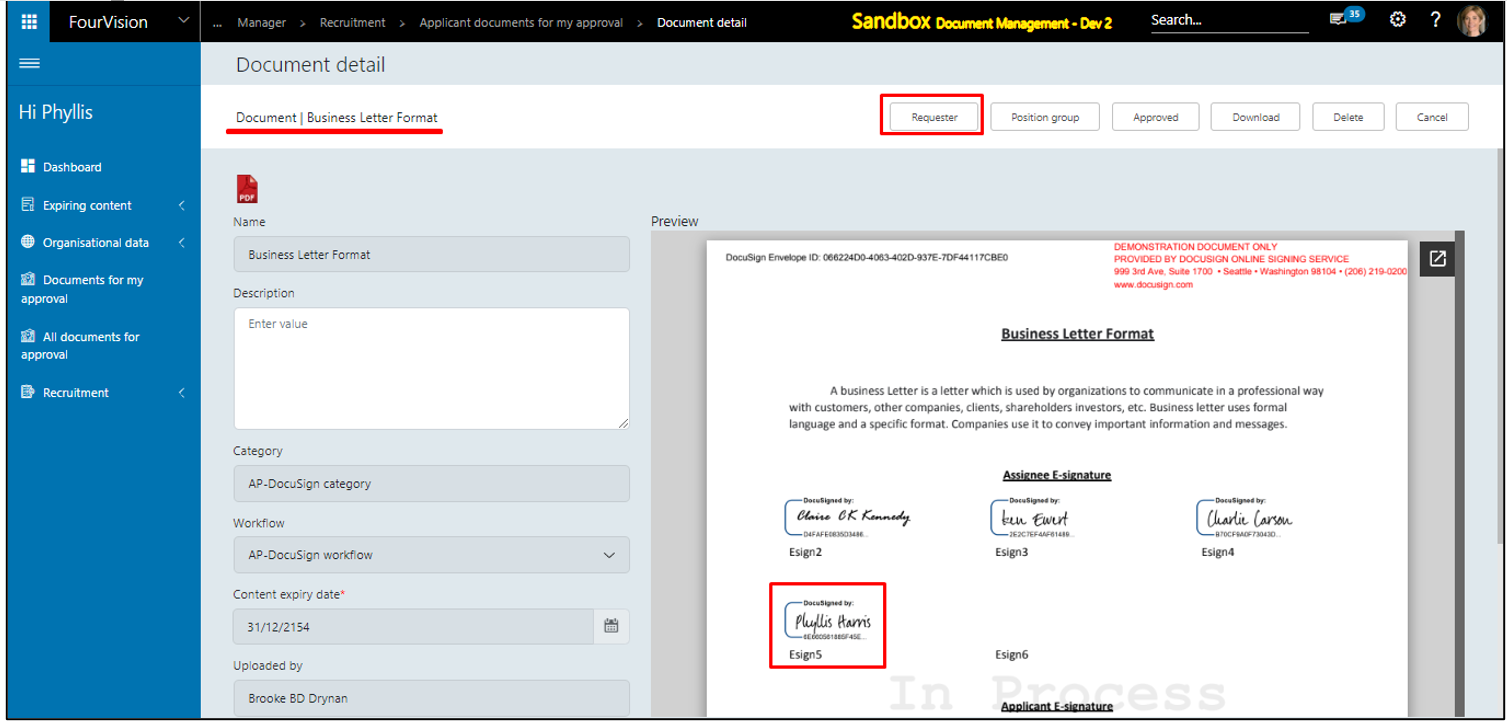
With the user ‘Brooke Drynan’ (Requester), get signing status
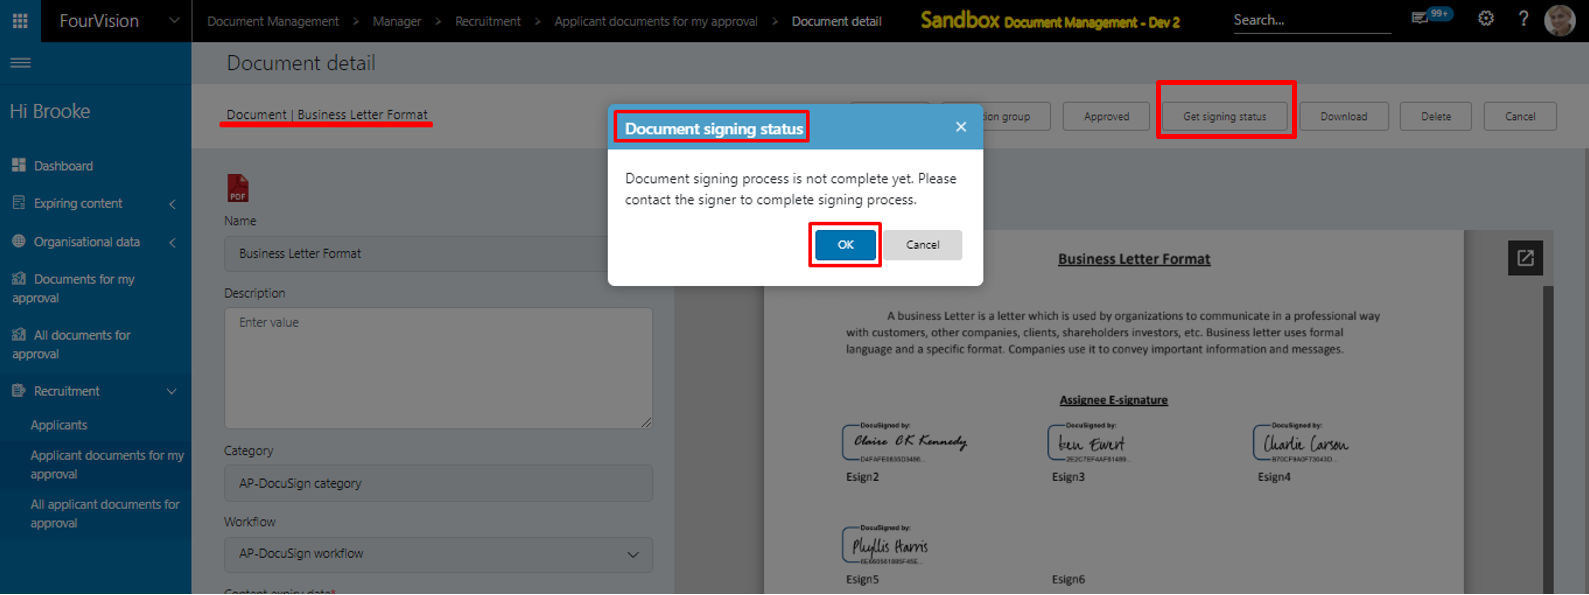
Review document to finish the signing process
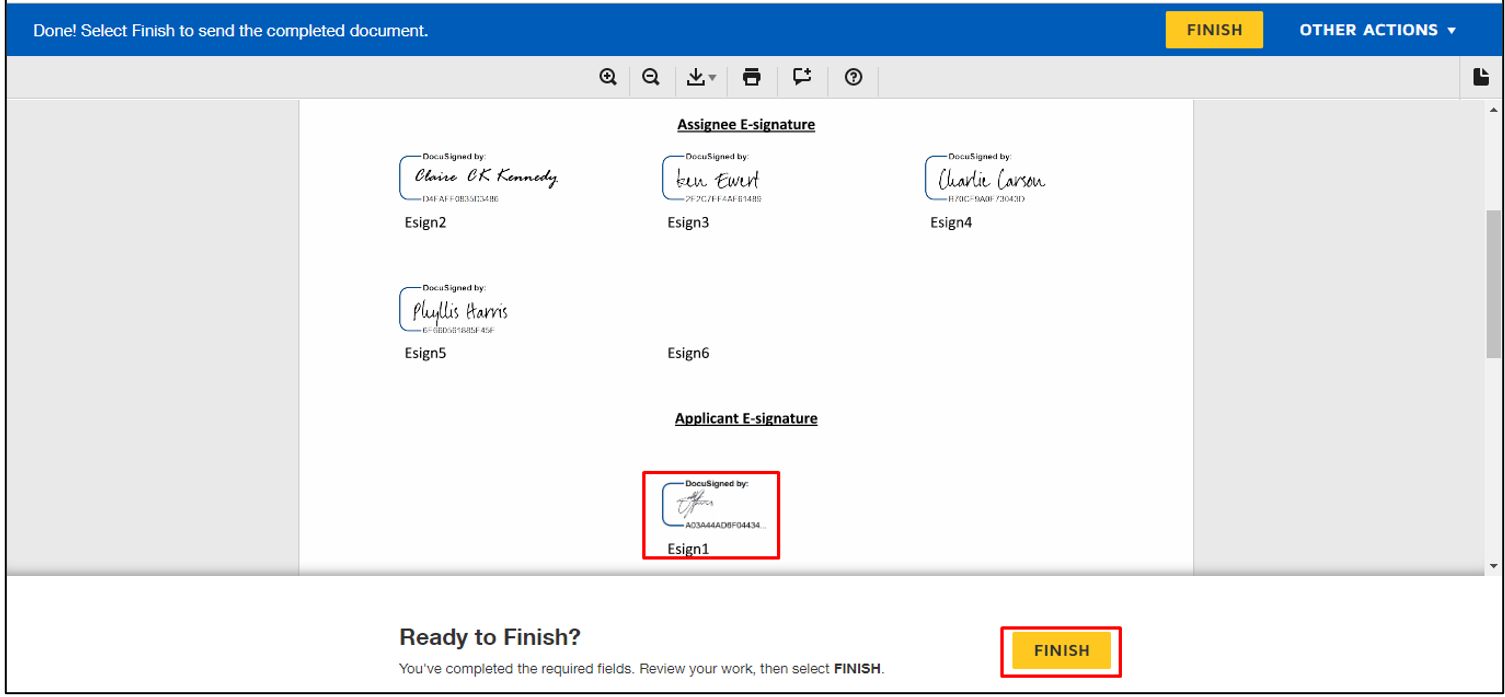
Click on 'Get signing status', to check the signing process finished
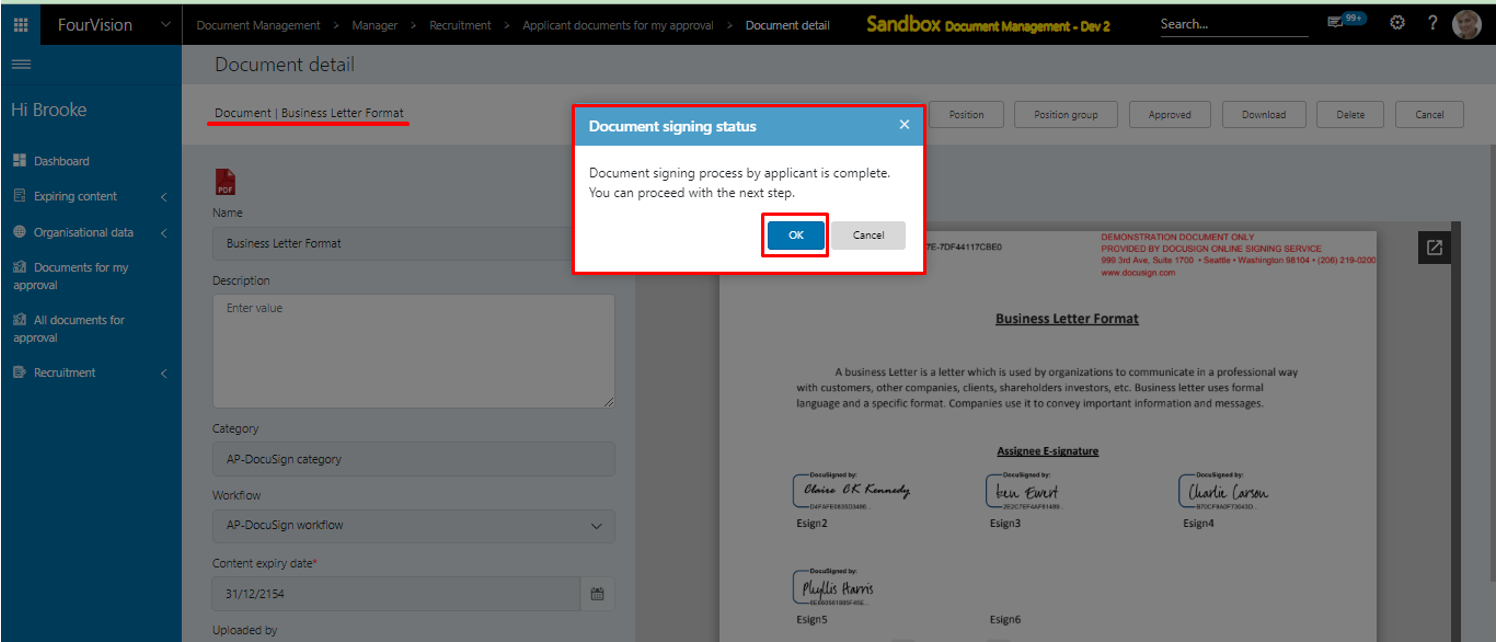
With the user ‘Claire Kennedy’ (Position group member), sign the document
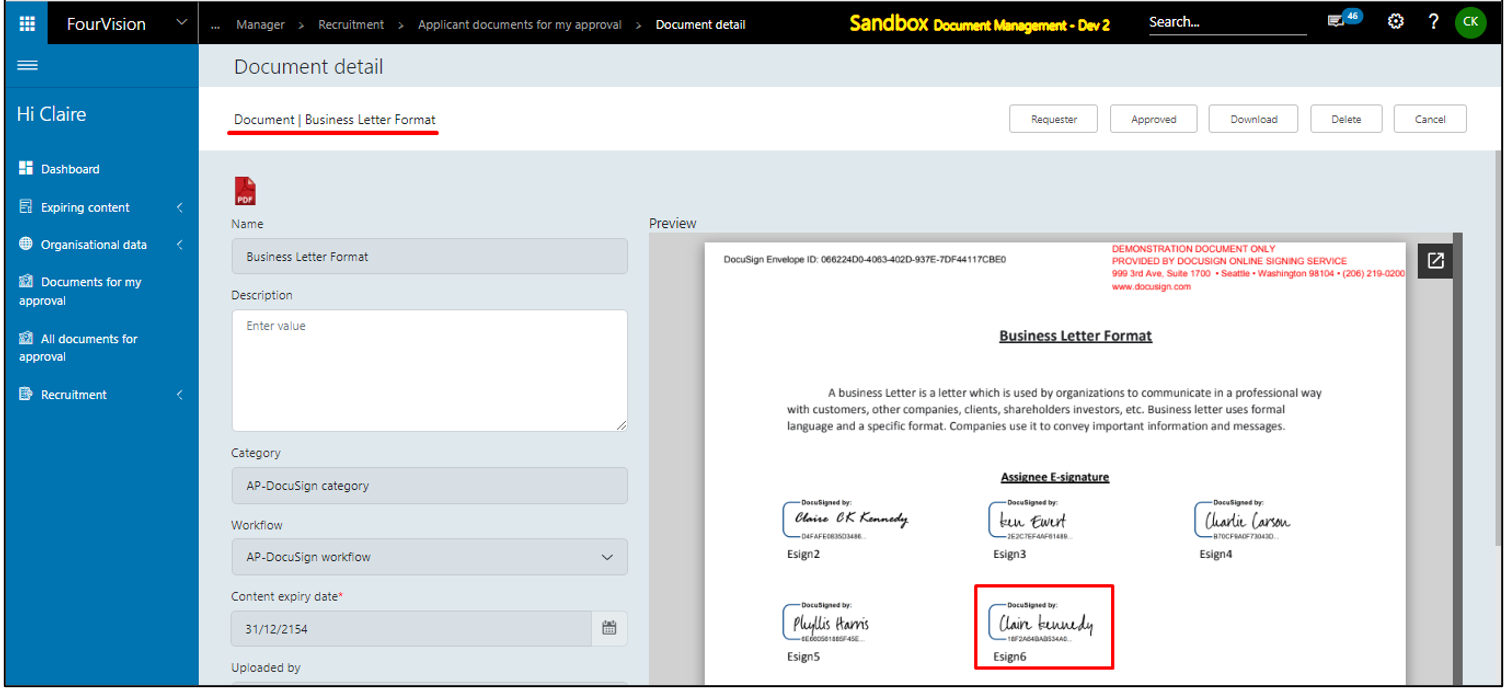
If the Status changed to ‘Position group’ and the name of the person will show in bold who will sign the document using DocuSign

Note: 1. New admin setup for Category and workflow assignment is required with new DocuSign settings. 2. If 'Document' is assigned to the 'Position group', position group members can view the 'Sign the document' button. Once the action is performed by any one of the members, the 'Sign the document' button will disappear. 3. If the Document is assigned to the 'Position group', only one member of the position group will get access of the 'Sign the document' button. 4. In case of signing the document with the Applicant, all the position group members have access to send the email to the applicant but the name of the member will not be bold.