Interface settings
All Apps in one envirionment are sharing the same connection to Dynamics 365 Finance and Operations, this means if you change after the initial deployment the connection settings like the system url or client id credentials you need to reboot all the apps in the envirionment before new settings will be active!
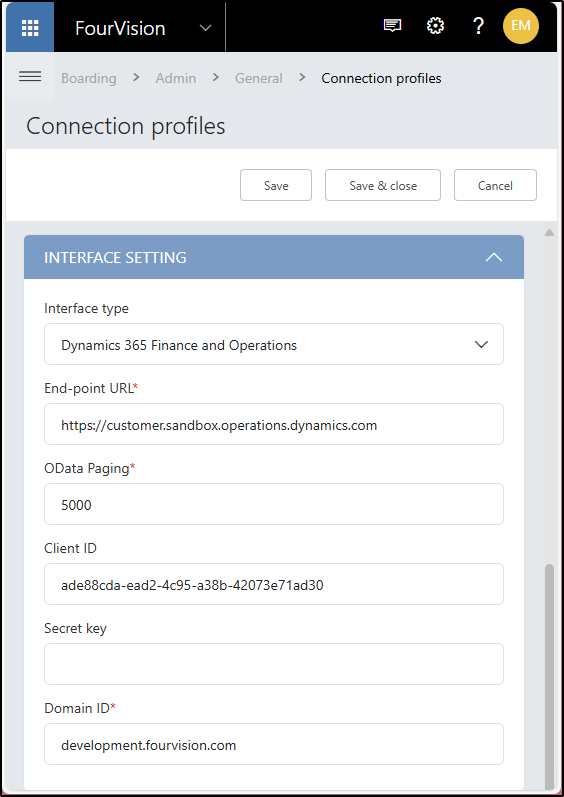
In the Admin section of the App you can navigate to:
Admin -> General -> -> Connection profiles

Here you find the interface settings, you can use the provided Client ID from our deployed user managed identity in the Microsoft Entra ID screen of the Dynamics Finance and Operations screen.
- Interface Type: Choose either “Dynamics 365 Finance and Operations” or “Disabled” to enable or disable the interface.
- End-point URL: Specify the path to the FNO URL without any additional components. Typically, the URL looks like https://[xxx].operations.dynamics.com.
- OData Paging: The default setting is 5000 records per sync cycle. You can adjust this value to optimize performance, especially on larger or underperforming systems.
- Client ID: By default, this field is populated with the unique client ID of the environment. It’s used for integration with FNO. If necessary, you can provide your own service principal.
- Secret Key: Leave this field empty unless you want to use a custom-created service principal. The Managed Identity of the User Service Principal is used by default.
- Domain ID: The default value is set to the tenant of the apps. However, in rare cases, if your apps need to connect to an externally hosted finance system in another tenant, you can use this option. Note that it requires a manually created service principal in the other tenant.
Dynamics 365 Finance and Operations interface
To connect to Dynamics 365 Finance and Operations you need to provide the an "Interface User" to the Dynamics 365 Finance and Operations system. Navigate as an System Administrator to the "Manage Users" screen in Dynamics 365 Finance and Operations.

Important
Populate the screen with the user name like WebApps this is the username that will hold default settings like "TimeZone", "Company" and can have the security limited to the required Data Entities.
Assign roles
You can assign the security role "System administrator" or a newly created role with limited access to the Data Entities used by the WebApp. The fields Username and Email can be anything and will not affect the functionality.
Instead of using the "System administrator" role you can create your own security role later for interfaces to tight the interface to the data entities used by the Web App.

Suggested roles for secure environments
- Data management migration user (or include limited entities to interface for used webapps on the custom role)
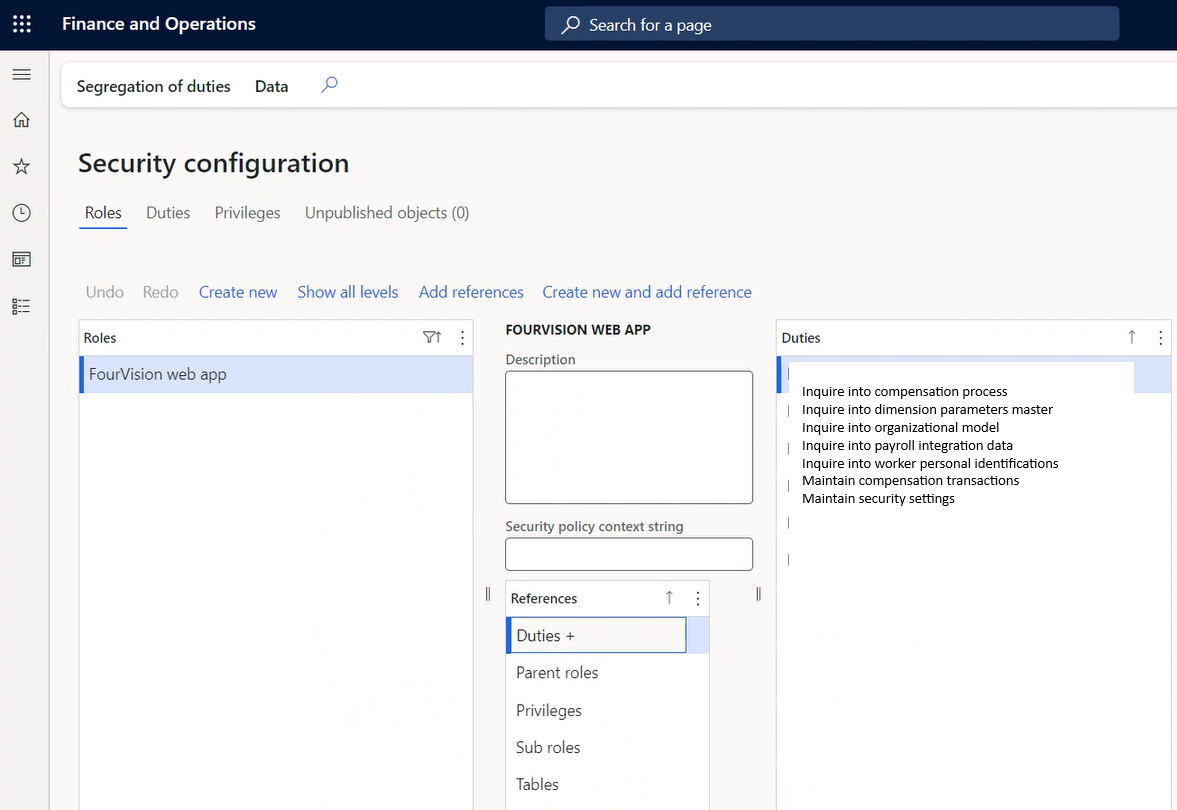
- Custom created roles with following duties:
- Inquire into compensation process
- Inquire into dimension parameters master
- Inquire into organizational model
- Inquire into payroll integration data
- Inquire into worker personal identifications
- Maintain compensation transactions
- Maintain security settings
Please note that above is a "starting" point for your secure role structures, The Fourvision Webapps are flexible in configuring and support custom entities and additions. During your project you might need to add entities to the integration if required by the implementation of the products.
For example when using Request WebApp additional duties like below might be needed to add for proper syncronisation:
- Inquire into address book and other party information
- Inquire into compensation process
Enable the API
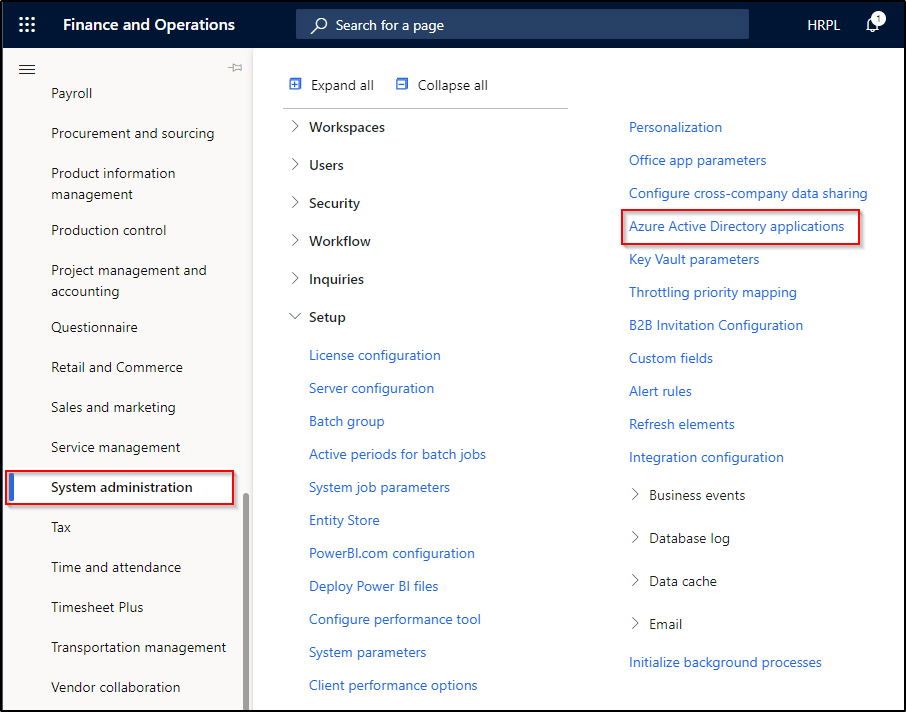
Navigate to the "Microsoft Entra ID applications" under the setup area of the System Administration Menu.

Add the Client ID key's from the Web-Apps Interface screen (for example we use ade88cda-ead2-4c95-a38b-42073e71ad30) here and assign them to the "WebApps" Interface User created previously.

You can now test the connection.