#Create a timesheet as employee There are two ways to fill in the timesheet. Daily timesheet view and the weekly timesheet view.
##Daily timesheet Go to the Employee dashboard and click the tile All timesheets
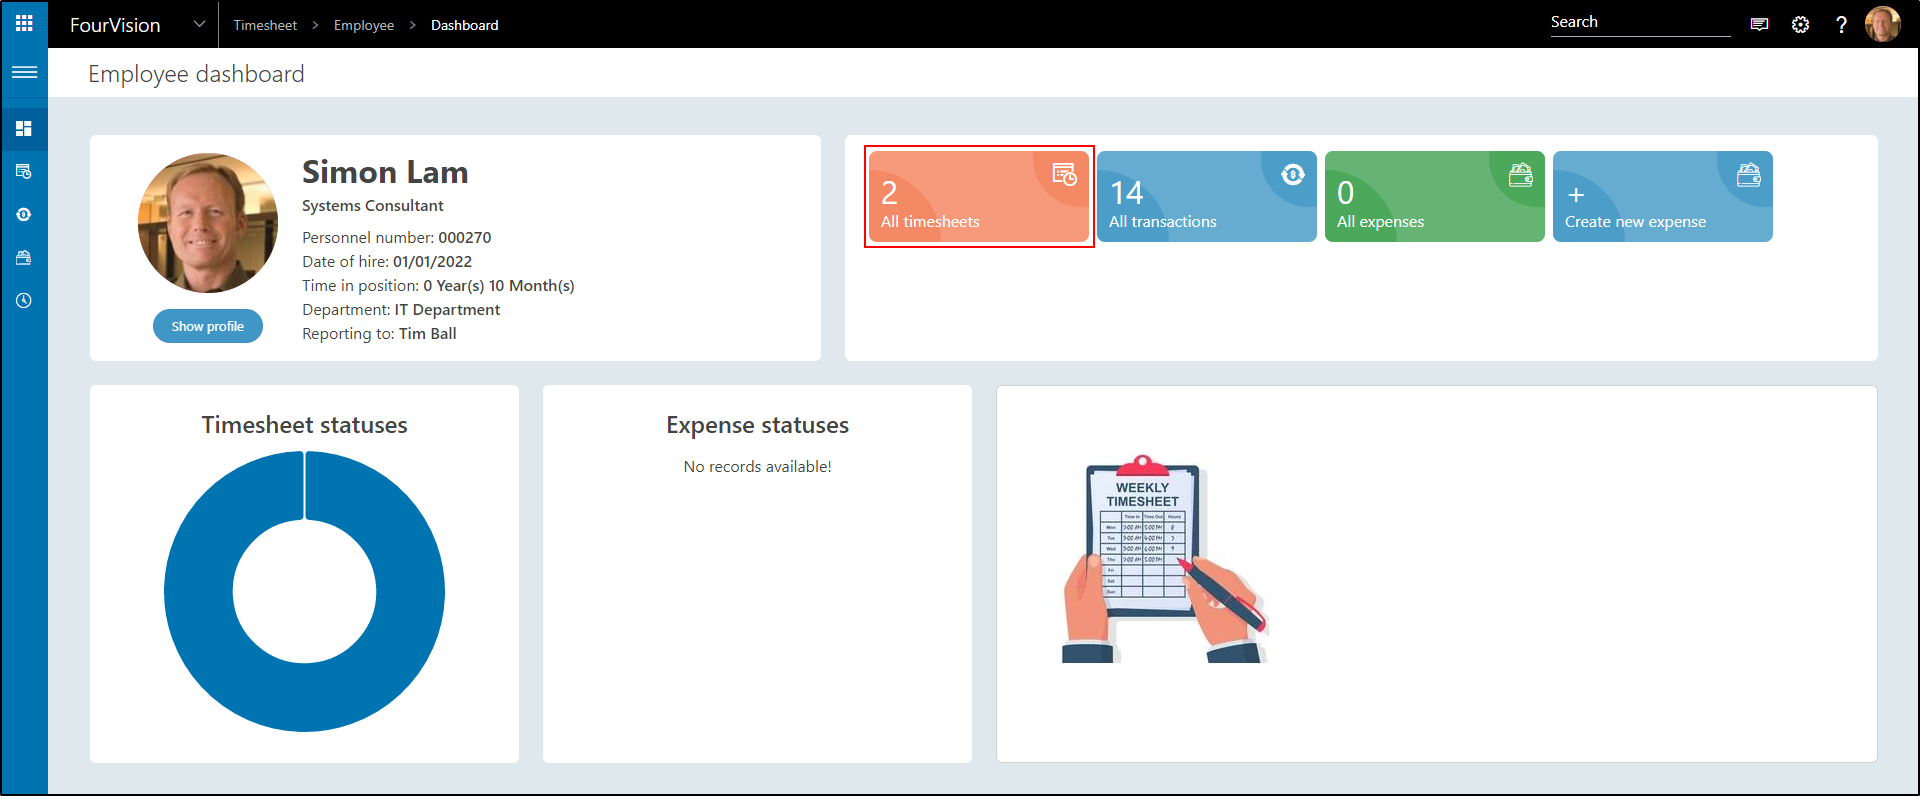
Create a new timesheet by click +New

Select the date

###New timesheet
There is the option to create a new timesheet or copy one from a previous period. For now, select New.

Click Add & Continue
Click +New

Add New Hours detail Fill in all the details about the hours spend on the task. The Date, Customer, Project, and Task are mandatory. Location and comment is by choice, but always keep in mind to add enough information.
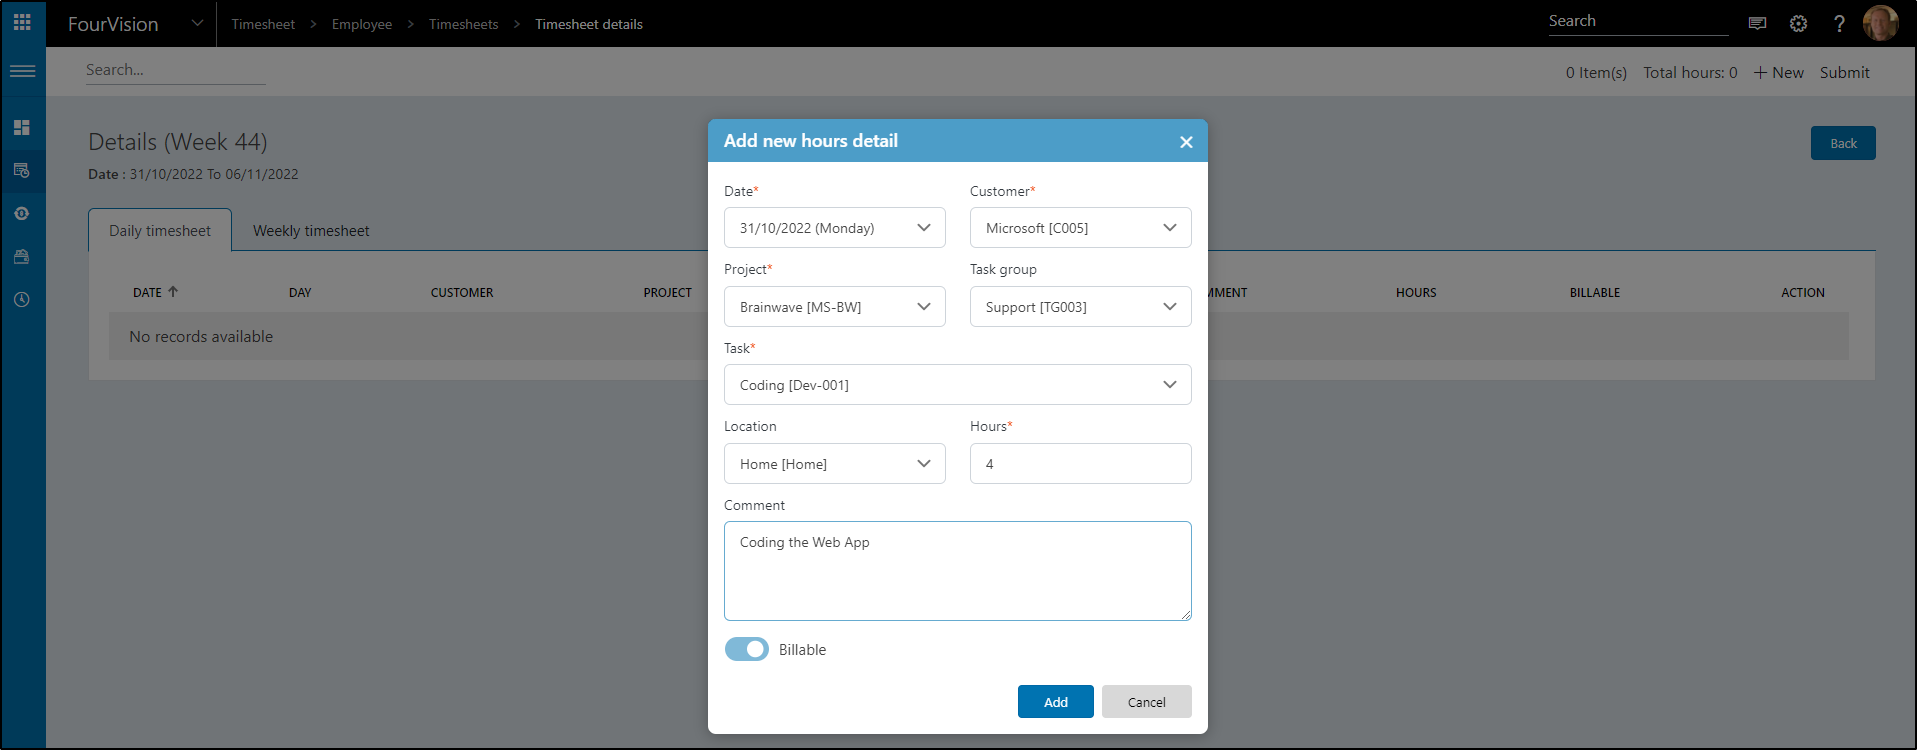
** There is an option to set a default location. See setup to see how that is done.
Click Add when you are done.

When you have filled in all your hours and checked if everything is correct including the billable options, you can Submit the timesheet.
###Copy timesheet
Go to All timesheets
Click +New

Select a date and select Copy from period
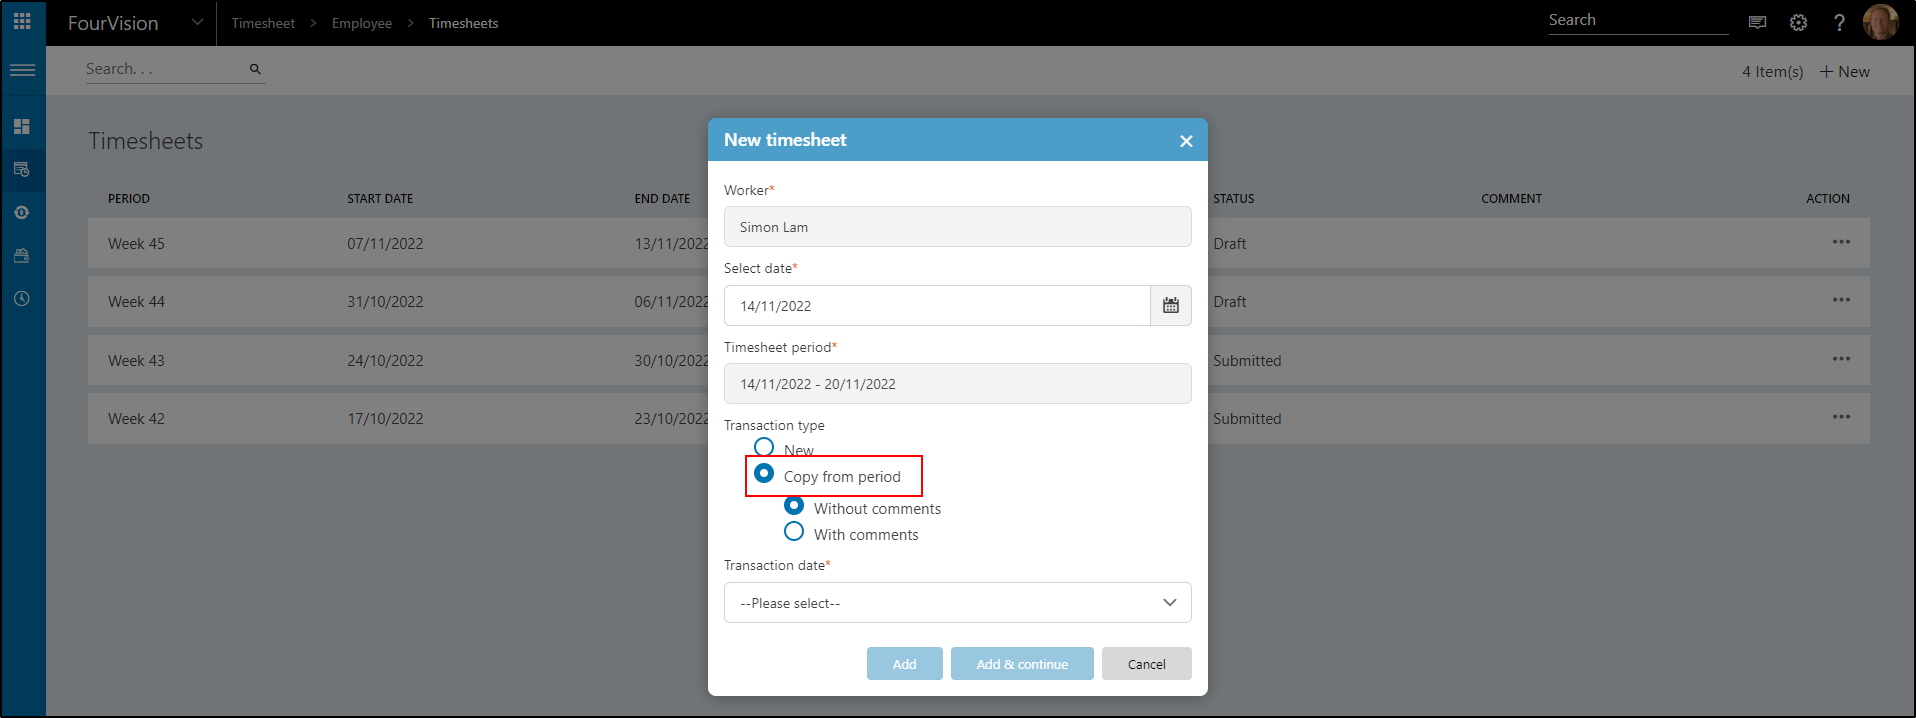
You have the option to copy without comments or with comments. These refer to the comments that are previously written on the hours of the timesheet copied.
Select 'with comments' and select the Transaction date. It is only possible to select timesheets from previous weeks.
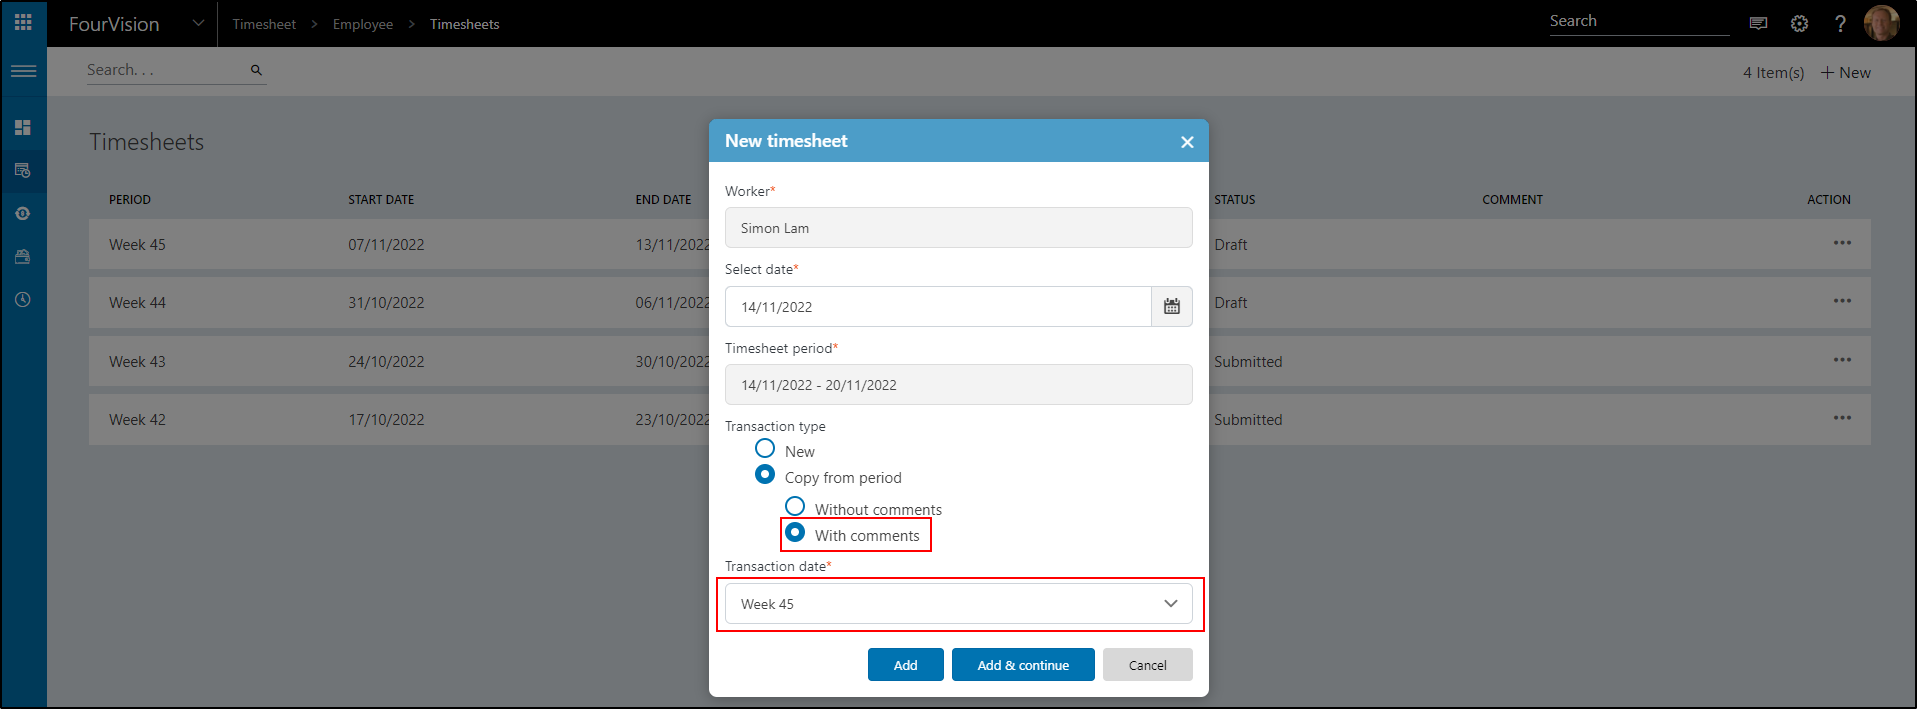
Click Add and Continue
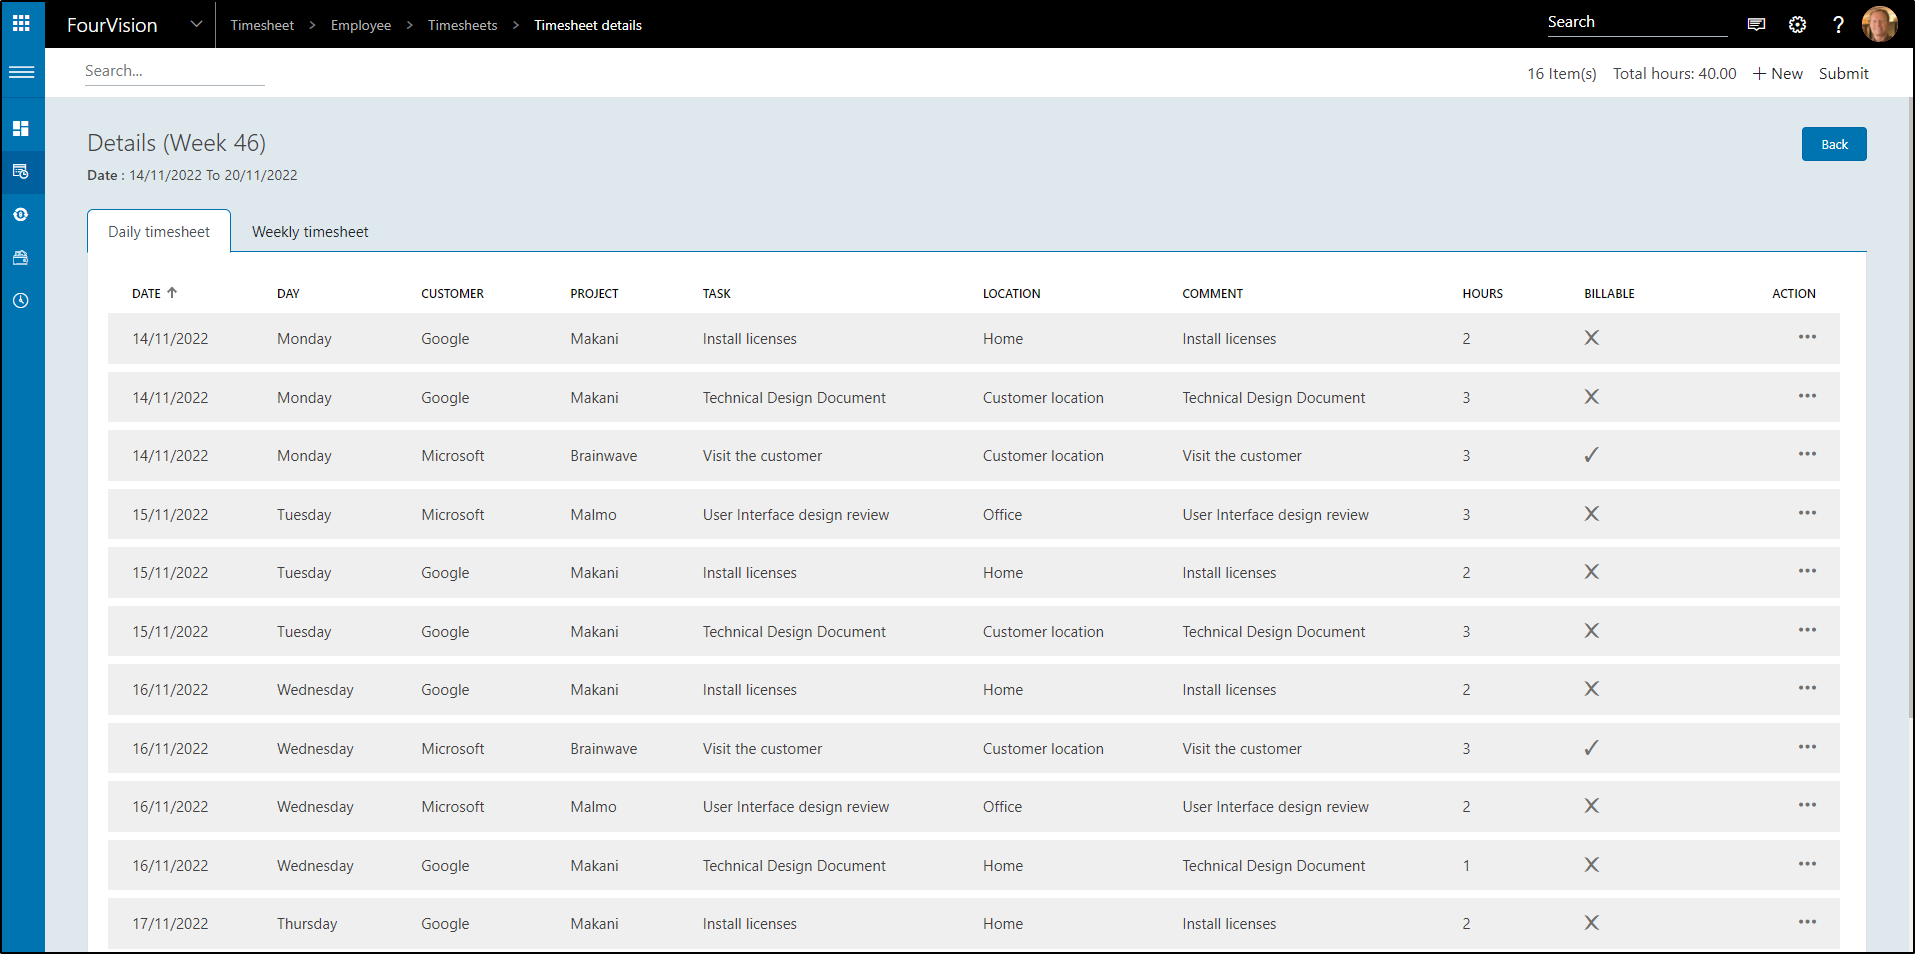
We have the complete timesheet with all the lines and comments available now. Week 45 and week 46 look exactly the same. From here you can delete, add, edit lines.
##Weekly timesheet Go to Timesheets and create a new timesheet. Select the date.

Click Add and continue

Switch to the Weekly timesheet

Click Add line

Select the Customer

Select the Project

Select the Taskgroup

Select the Task

Click Save.
Fill in the hours

Next, Select the Location, set a Comment and select whether it is billable YES / NO.
** In some cases it is not possible to switch the billable option (forced in setup)

Add another line
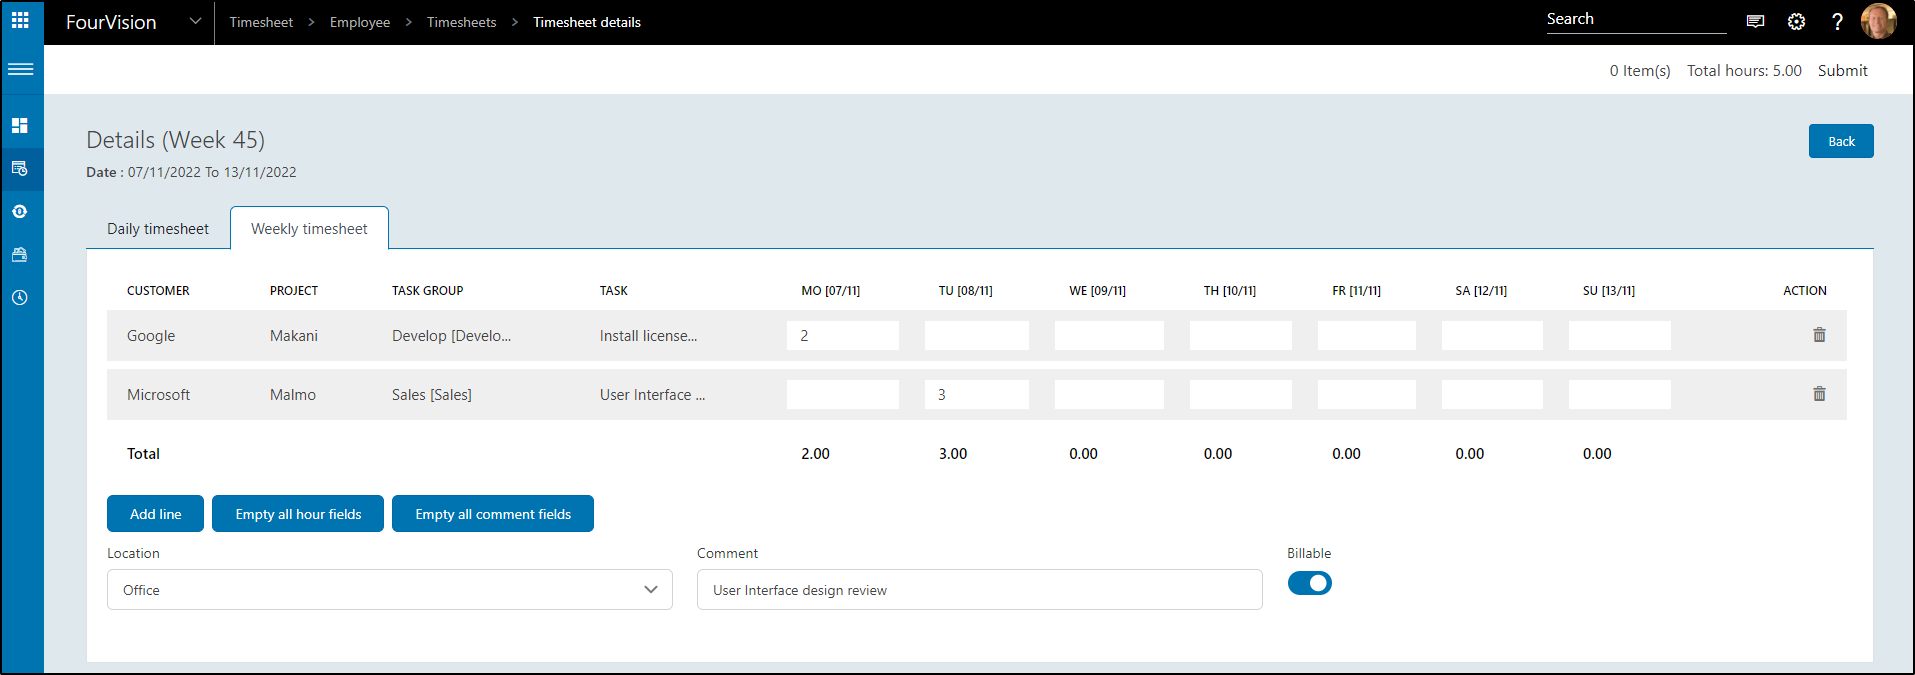
The advantage of Weekly timesheet is that it is easier to fill in if you have a lot of reoccurring tasks throughout the week. If you have a lot of different tasks it might be easier to use the Daily timesheet option.
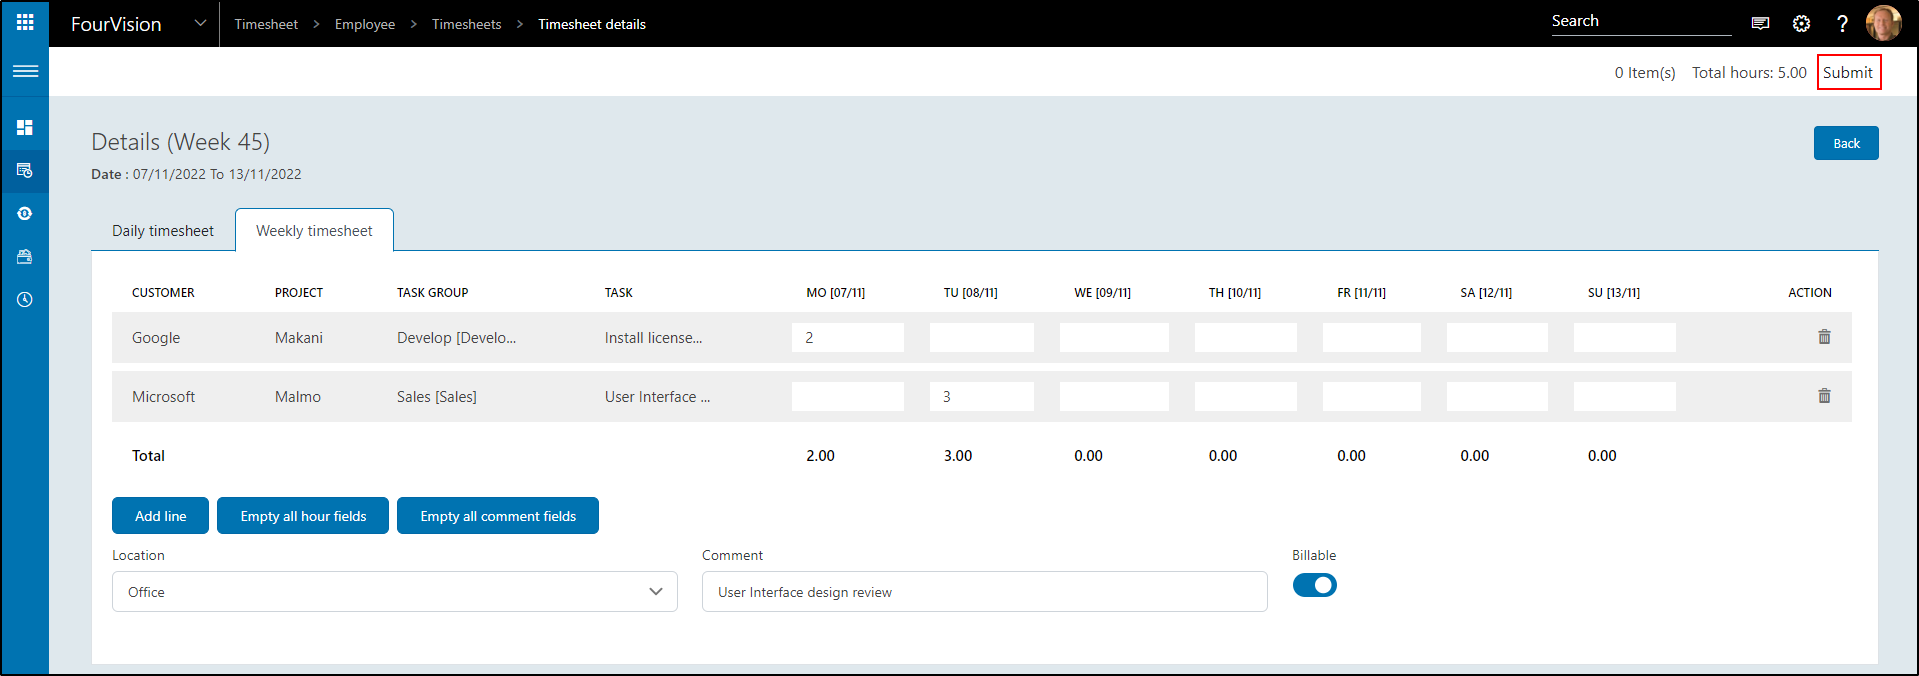
After you are completely done, click the Submit button.
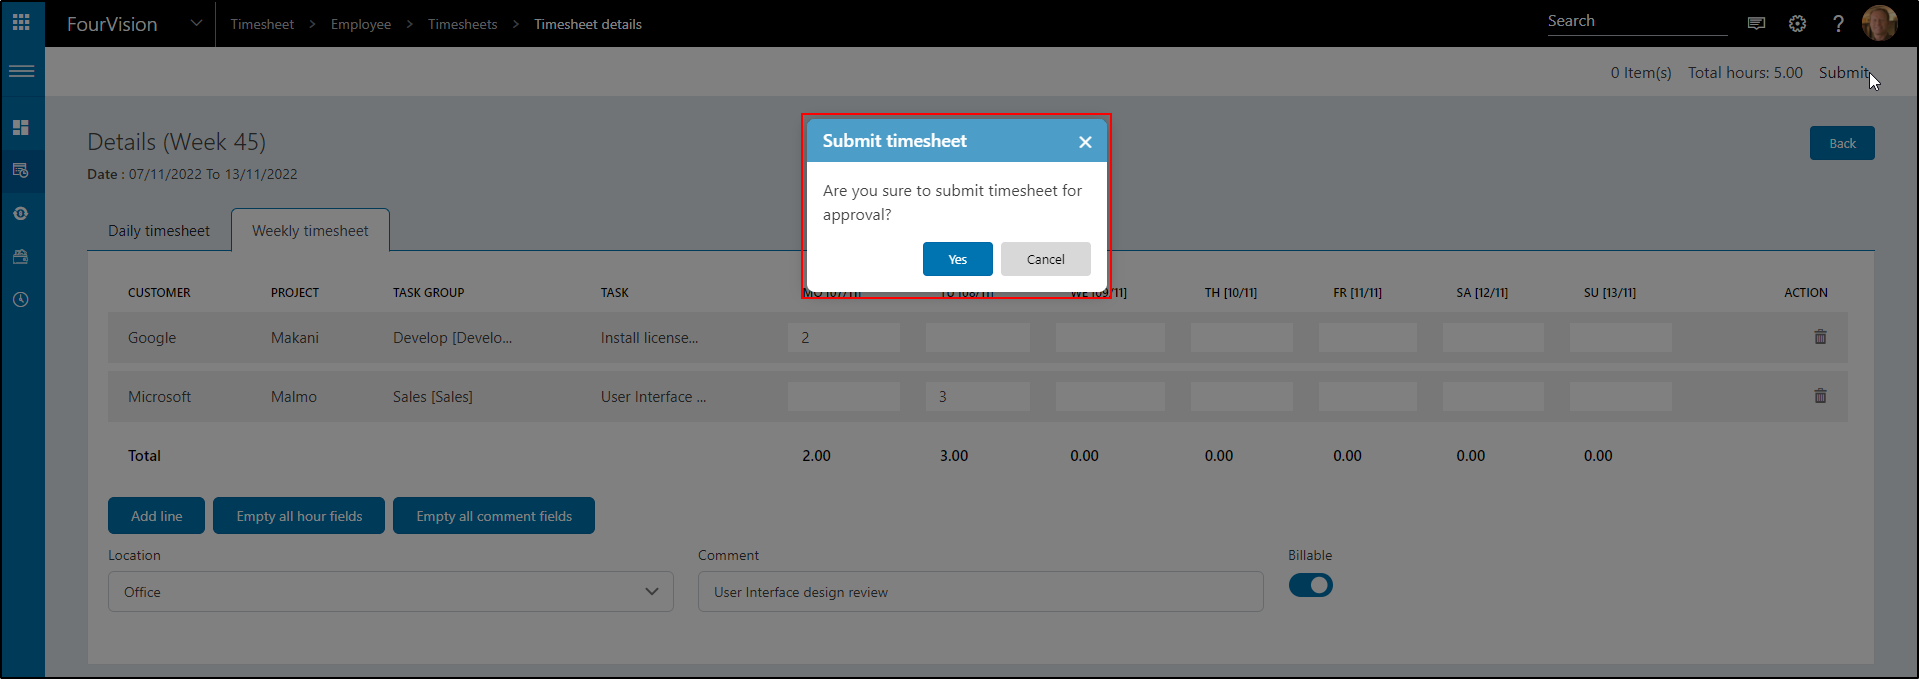
Make sure you did not forget anything, then click Yes.
The Timesheet is Submitted and can now be found at the Transactions.
###Empty all hour fields
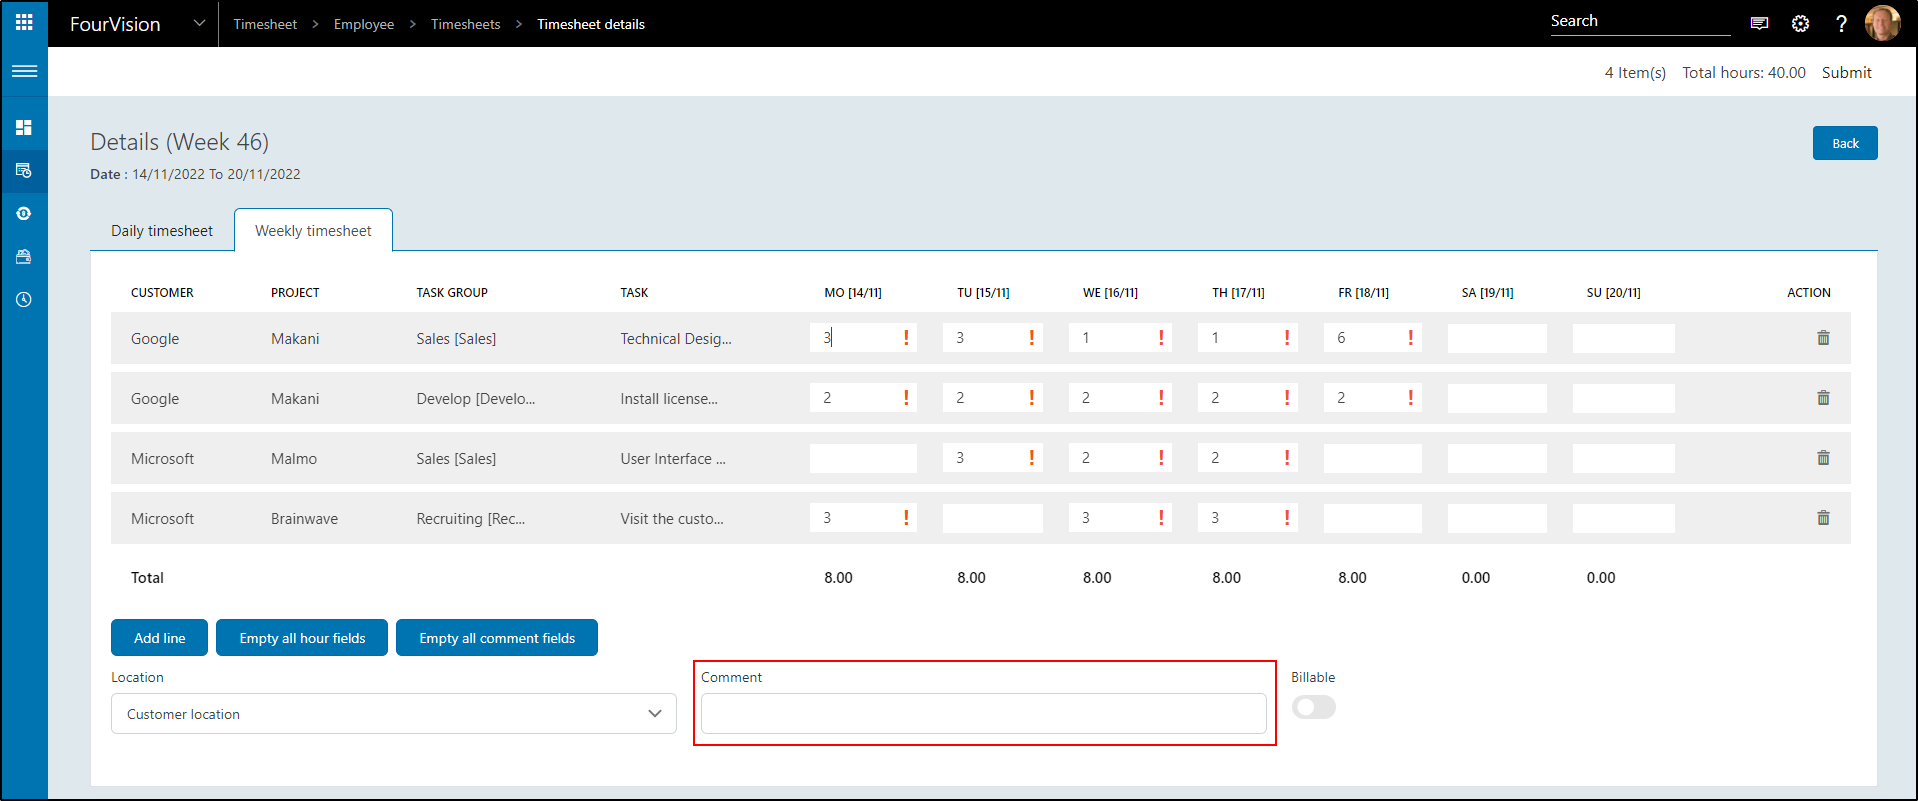
As noticed, there are two more buttons in the weekly timesheet: Empty all hour fields and Empty all comment fields.
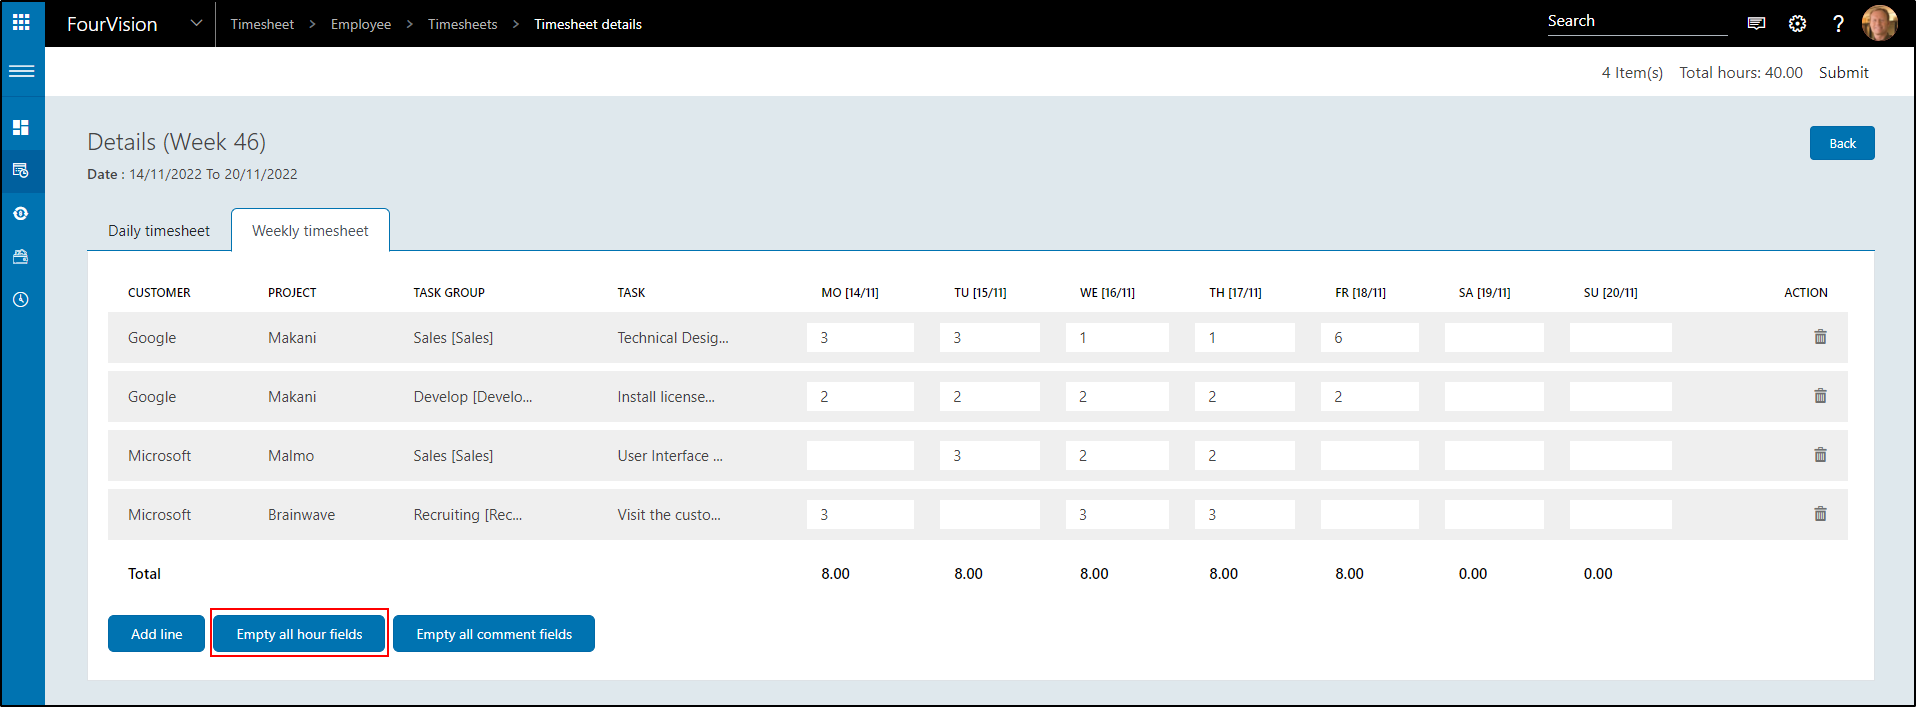
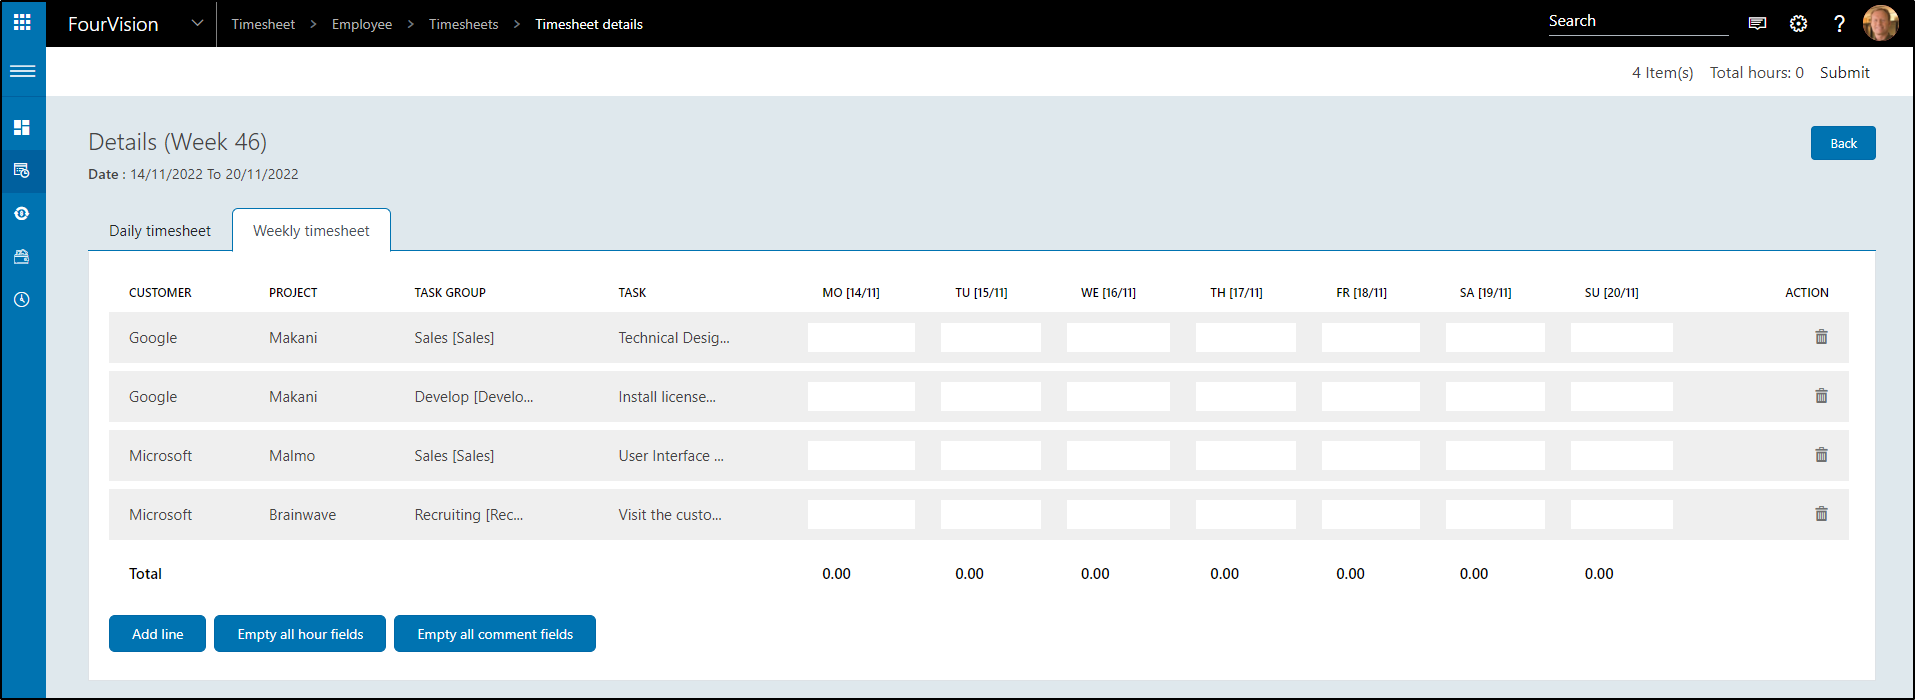
If you have made mistakes, or have a copied timesheet and want to clear the hours quickly so you can fill in new hours, just hit the Empty all hour fields and all hours will be gone. The lines will stay though, so you can fill in new hours.
Hit the button and see the result
###Empty all comment fields
As noticed, there is a button 'Empty all comment fields'
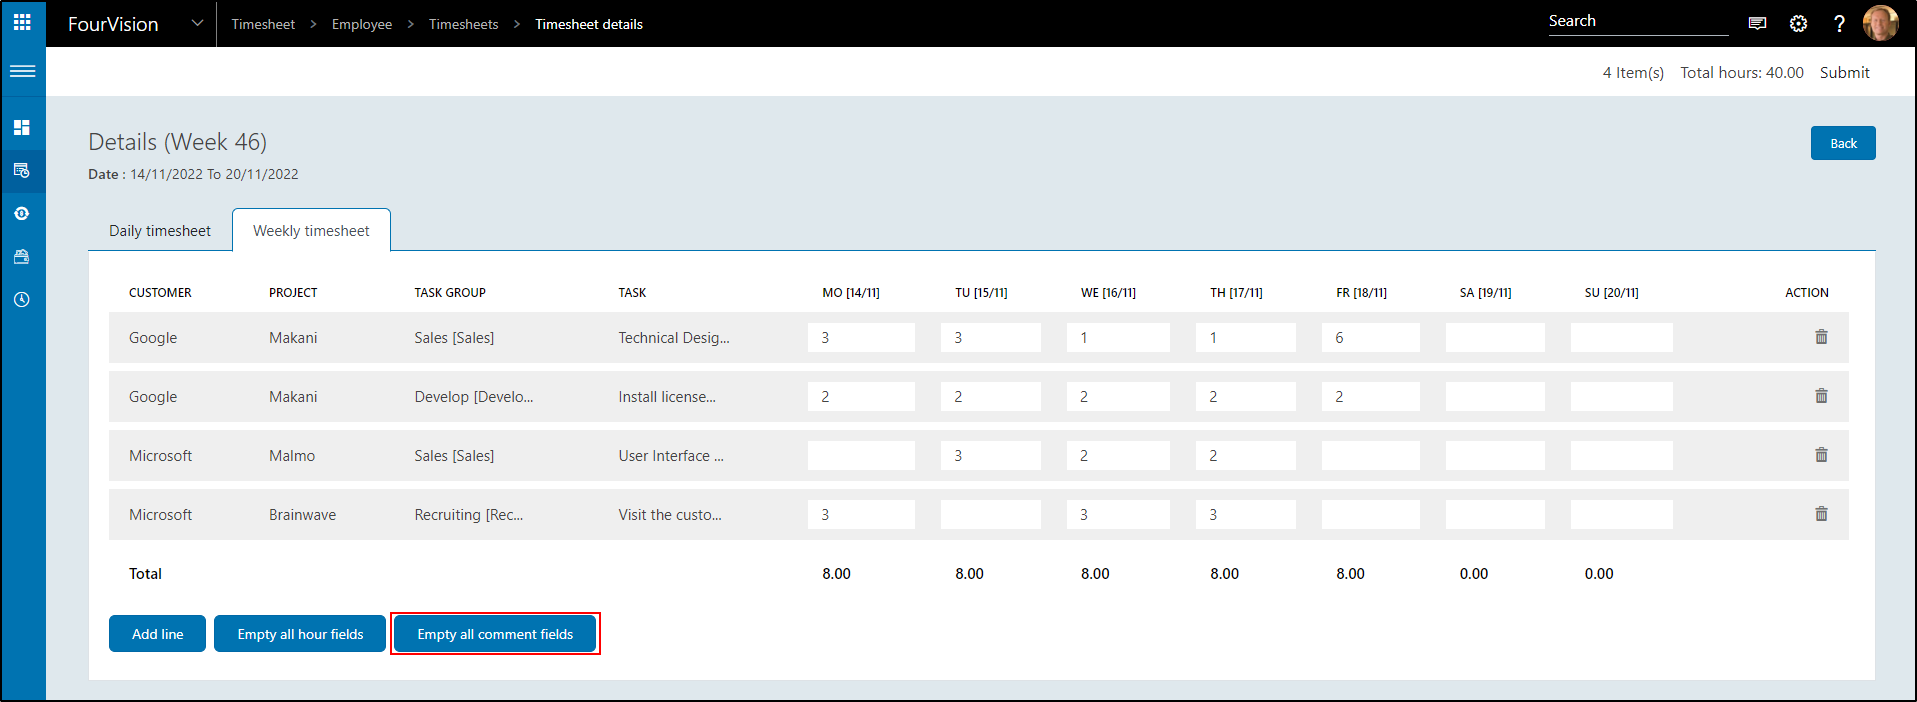
When this button is clicked, all the comments from the lines disappear.
Click the button:
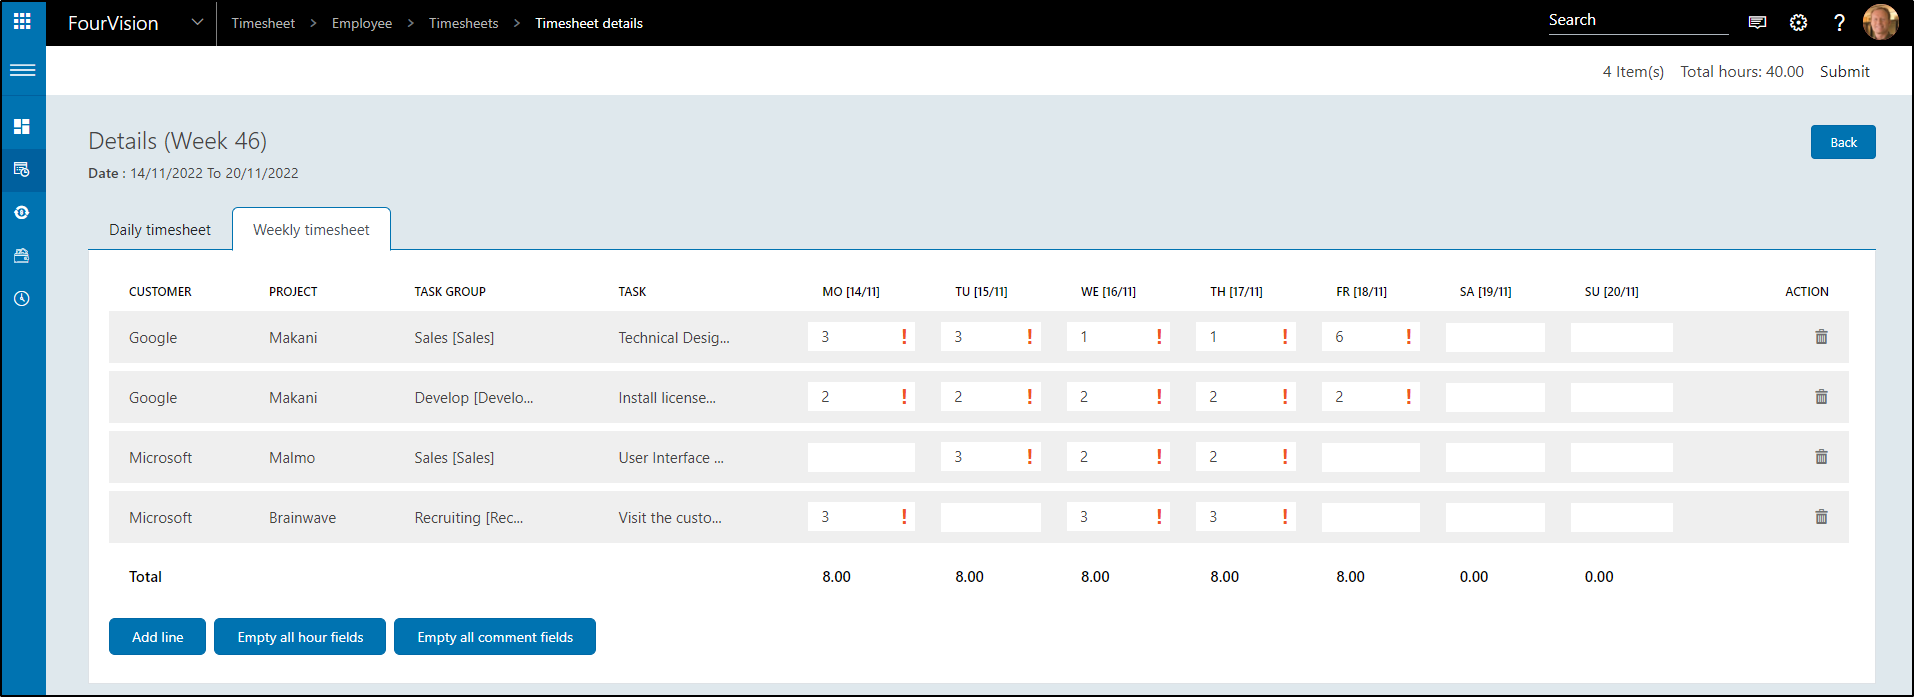
The comments are gone
Switch to Daily timesheet and check
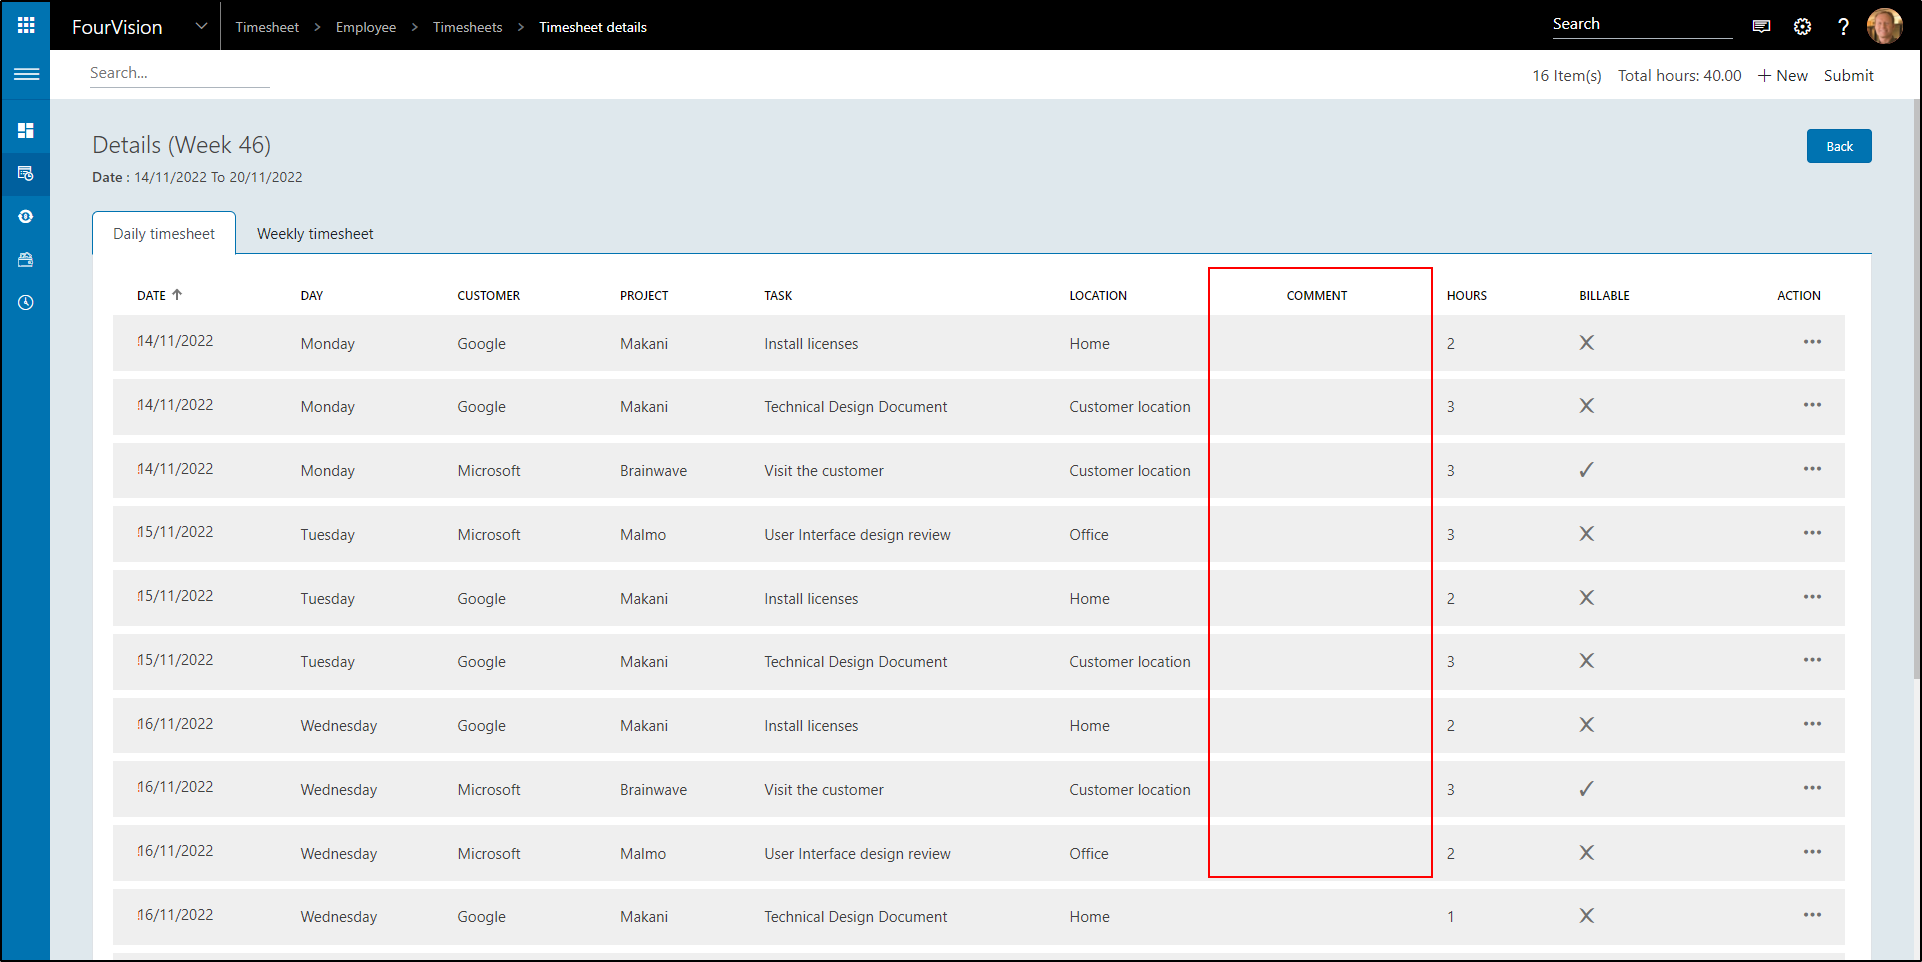
Because of this, a lot of exclamation marks show. This is because filling in comments is mandatory.
Fill in new comments and you are done.